Hi, welcome to my first article of 2024 🎉
In this article, we will have a basic overview on a couple of common elements within a CI/CD pipeline. We will also see how easily we can develop a pipeline for creating a Docker image for a quite basic Python Application and publish that Docker image automatically. On top of that, we will use a free SAST Security Scanner to check our code in the deployment pipeline.
Wait, whare are these?
If you are interested in this article, I assume you already know what Jenkins, Docker etc. are and you have the following tools installed and configured on your computer. Yet, let’s have a look at their official description.
Jenkins
Jenkins is an open source automation server which enables developers around the world to reliably build, test, and deploy their software.
Source: Jenkins Official Website

Docker
Docker is a platform designed to help developers build, share, and run container applications. We handle the tedious setup, so you can focus on the code.
Source: Docker Official Website

Trivy
Trivy is the most popular open source security scanner for Vulnerability &, IaC, SBOM discovery, cloud scanning and Kubernetes security.
Source: Trivy Official Website

OWASP Dependency-Check
Dependency-Check is a Software Composition Analysis (SCA) tool that attempts to detect publicly disclosed vulnerabilities contained within a project’s dependencies.
Source: OWASP Dependency-Check Official Website

Safety CLI
Safety CLI 3 is a Python dependency vulnerability scanner that enables the secure use of Python packages, from development to deployment.
Source: SafetyCLI Official Website

Static Application Security Testing (SAST)
Static application security testing (SAST) is used to secure software by reviewing the source code of the software to identify sources of vulnerabilities.
Source: Wikipedia
Dynamic Application Security Testing (DAST)
A dynamic application security testing (DAST) is a non functional testing process where one can assess an application using certain techniques and the end result of such testing process covers security weaknesses and vulnerabilities present in an application.
Source: Wikipedia
Let’s Do It!
Okay. It’s hard to explain the functionality of these tools in a single article so let’s directly get into implementing it.
We begin with our Python application. You can take any basic Python application. If you don’t want to navigate to other places too much, you can use the code in this article. You can use any text editor. My preference will be using a good IDE like PyCharm.
At first, create a folder where we will put our Python files. Inside that folder, create a python file named “app.py” and put the following code in that file and save:
from flask import *

app = Flask(__name__)

@app.route('/')
def home():
    return ("<body style='background-color: #9dffff; height=100%; display:flex;'>"
            "<div style='font-family: Poppins; display:flex; flex-direction: column; align-self: center; width: 100%'>"
            "<h1 style='text-align:center'>Welcome to Jenkins CI/CD Pipeline for Python Application</h1>"
            "<h2 style='text-align:center'>Also with SAST Security Scan</h2>"
            "</div>"
            "</body>")

if __name__ == '__main__':
    app.run(debug=True, host="0.0.0.0", port=5000)
Then create another python file named “testRoutes.py” and put the following code in that file and save:
from app import *

def test_Home():
    response = app.test_client().get('/')
    assert b"<body style='background-color: #9dffff; height=100%; display:flex;'><div style='font-family: Poppins; display:flex; flex-direction: column; align-self: center; width: 100%'><h1 style='text-align:center'>Welcome to Jenkins CI/CD Pipeline for Python Application</h1><h2 style='text-align:center'>Also with SAST Security Scan</h2></div></body>" in response.data
    assert response.status_code == 200
That’s basically all for this tiny little Python application. This will serve a static website over the specified port 5000. You can use any port you prefer. Just update the port in the “app.py” file and save.
I’m not explaining the Python code becuase that’s not the focus here. I’ll explain the Jenkinsfile code below.
Create another file named “requirements.txt” and put these three lines in that and save:
flask
Jinja2
pytest
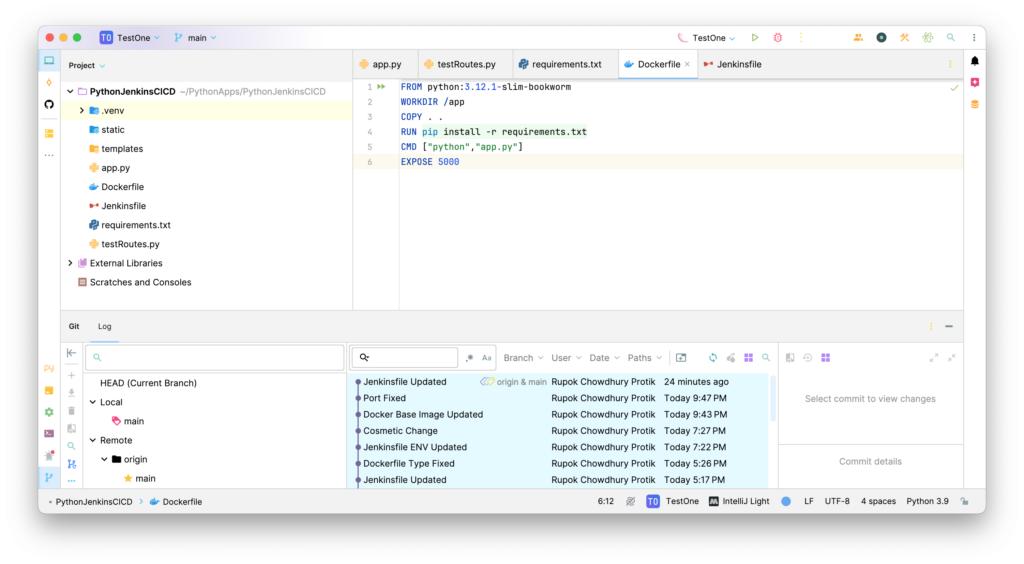
Let’s move on to configuring the Dockerfile. Create a file named “Dockerfile” and put the following code in that and save:
FROM python:3.12.1-slim-bookworm
WORKDIR /app
COPY . .
RUN pip install -r requirements.txt
CMD ["python","app.py"]
EXPOSE 5000
That’s all for Docker. Now we can move to creating our Jenkinsfile. Create a new file named “Jenkinsfile” and put the following code there:
pipeline {

    agent any

    stages {
        stage('Checkout') {
            steps {
                git branch: 'main', credentialsId: 'github', url: 'https://github.com/username/your-repository-name.git'
            }
        }

        stage('Prepare') {
            steps {
                sh 'pip3 install -r requirements.txt'
            }
        }

        stage('Test') {
            steps {
                sh 'pytest testRoutes.py'
            }
        }

        stage('SAST') {
            steps {
                sh 'safety check'
            }
        }

        stage('SCA') {
            steps {
                dependencyCheck additionalArguments: '', odcInstallation: 'OWASP-Dependency-Scan'
                dependencyCheckPublisher pattern: '**/dependency-check-report.xml'
            }
        }

        stage('Build') {
            steps {
                script {
                    sh 'docker build -t username/docker-image-name .'
                }
            }
        }

        stage('Deploy') {
            steps {
                script {
                    withCredentials([usernamePassword(credentialsId: 'dockerhub', passwordVariable: 'dhpass', usernameVariable: 'dhuser')]) {
                        sh 'docker login -u ${dhuser} -p ${dhpass}'
                        sh 'docker push rupokify/python-jenkins-testone'
                    }
                }
            }
        }

        stage('DAST') {
            steps {
                script {
                    sh 'trivy image username/docker-image-name:latest'
                }
            }
        }

    }

}
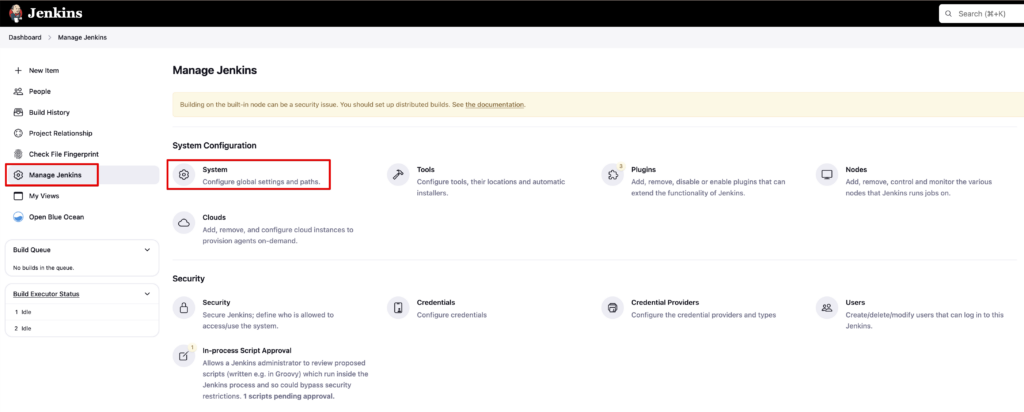
First of all, you need to add the paths for the tools based on your system in your Jenkins. To add PATH Environmental Variables in Jenkins, go to “Jenkins Dashboard > Manage Jenkins > System > Global properties” area. You can easily find the path of the tools (e.g. pip3, docker etc.) with the “which” command. Also update the GitHub repository URL in the file. You will have your repository URL in a few minutes if you keep following this article.
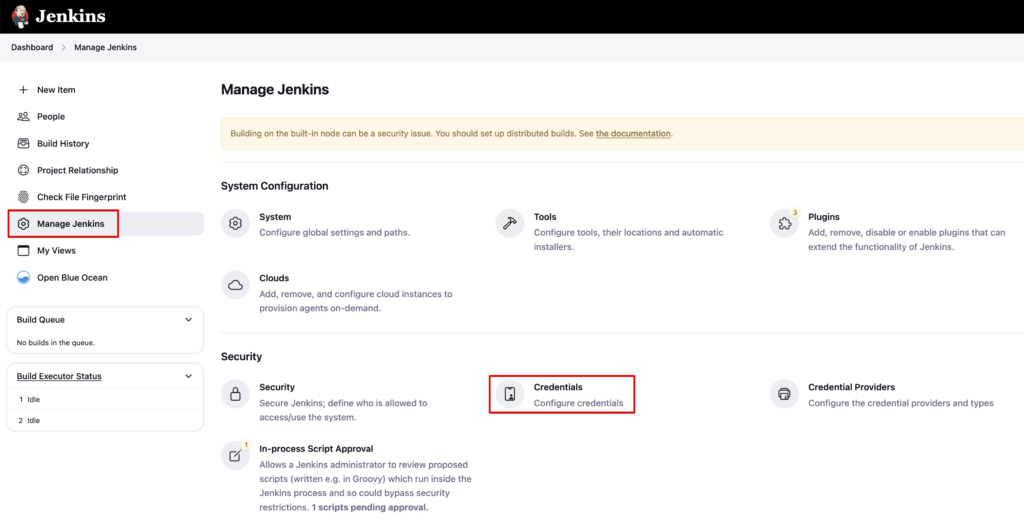
You will also need to add your DockerHub and GitHub credentials in “Jenkins Dashboard > Manage Jenkins > Credentials” area. I have named my GitHub credentials ID as “github” and DockerHub credentials ID as “dockerhub” which you can see in the Jenkinsfile.
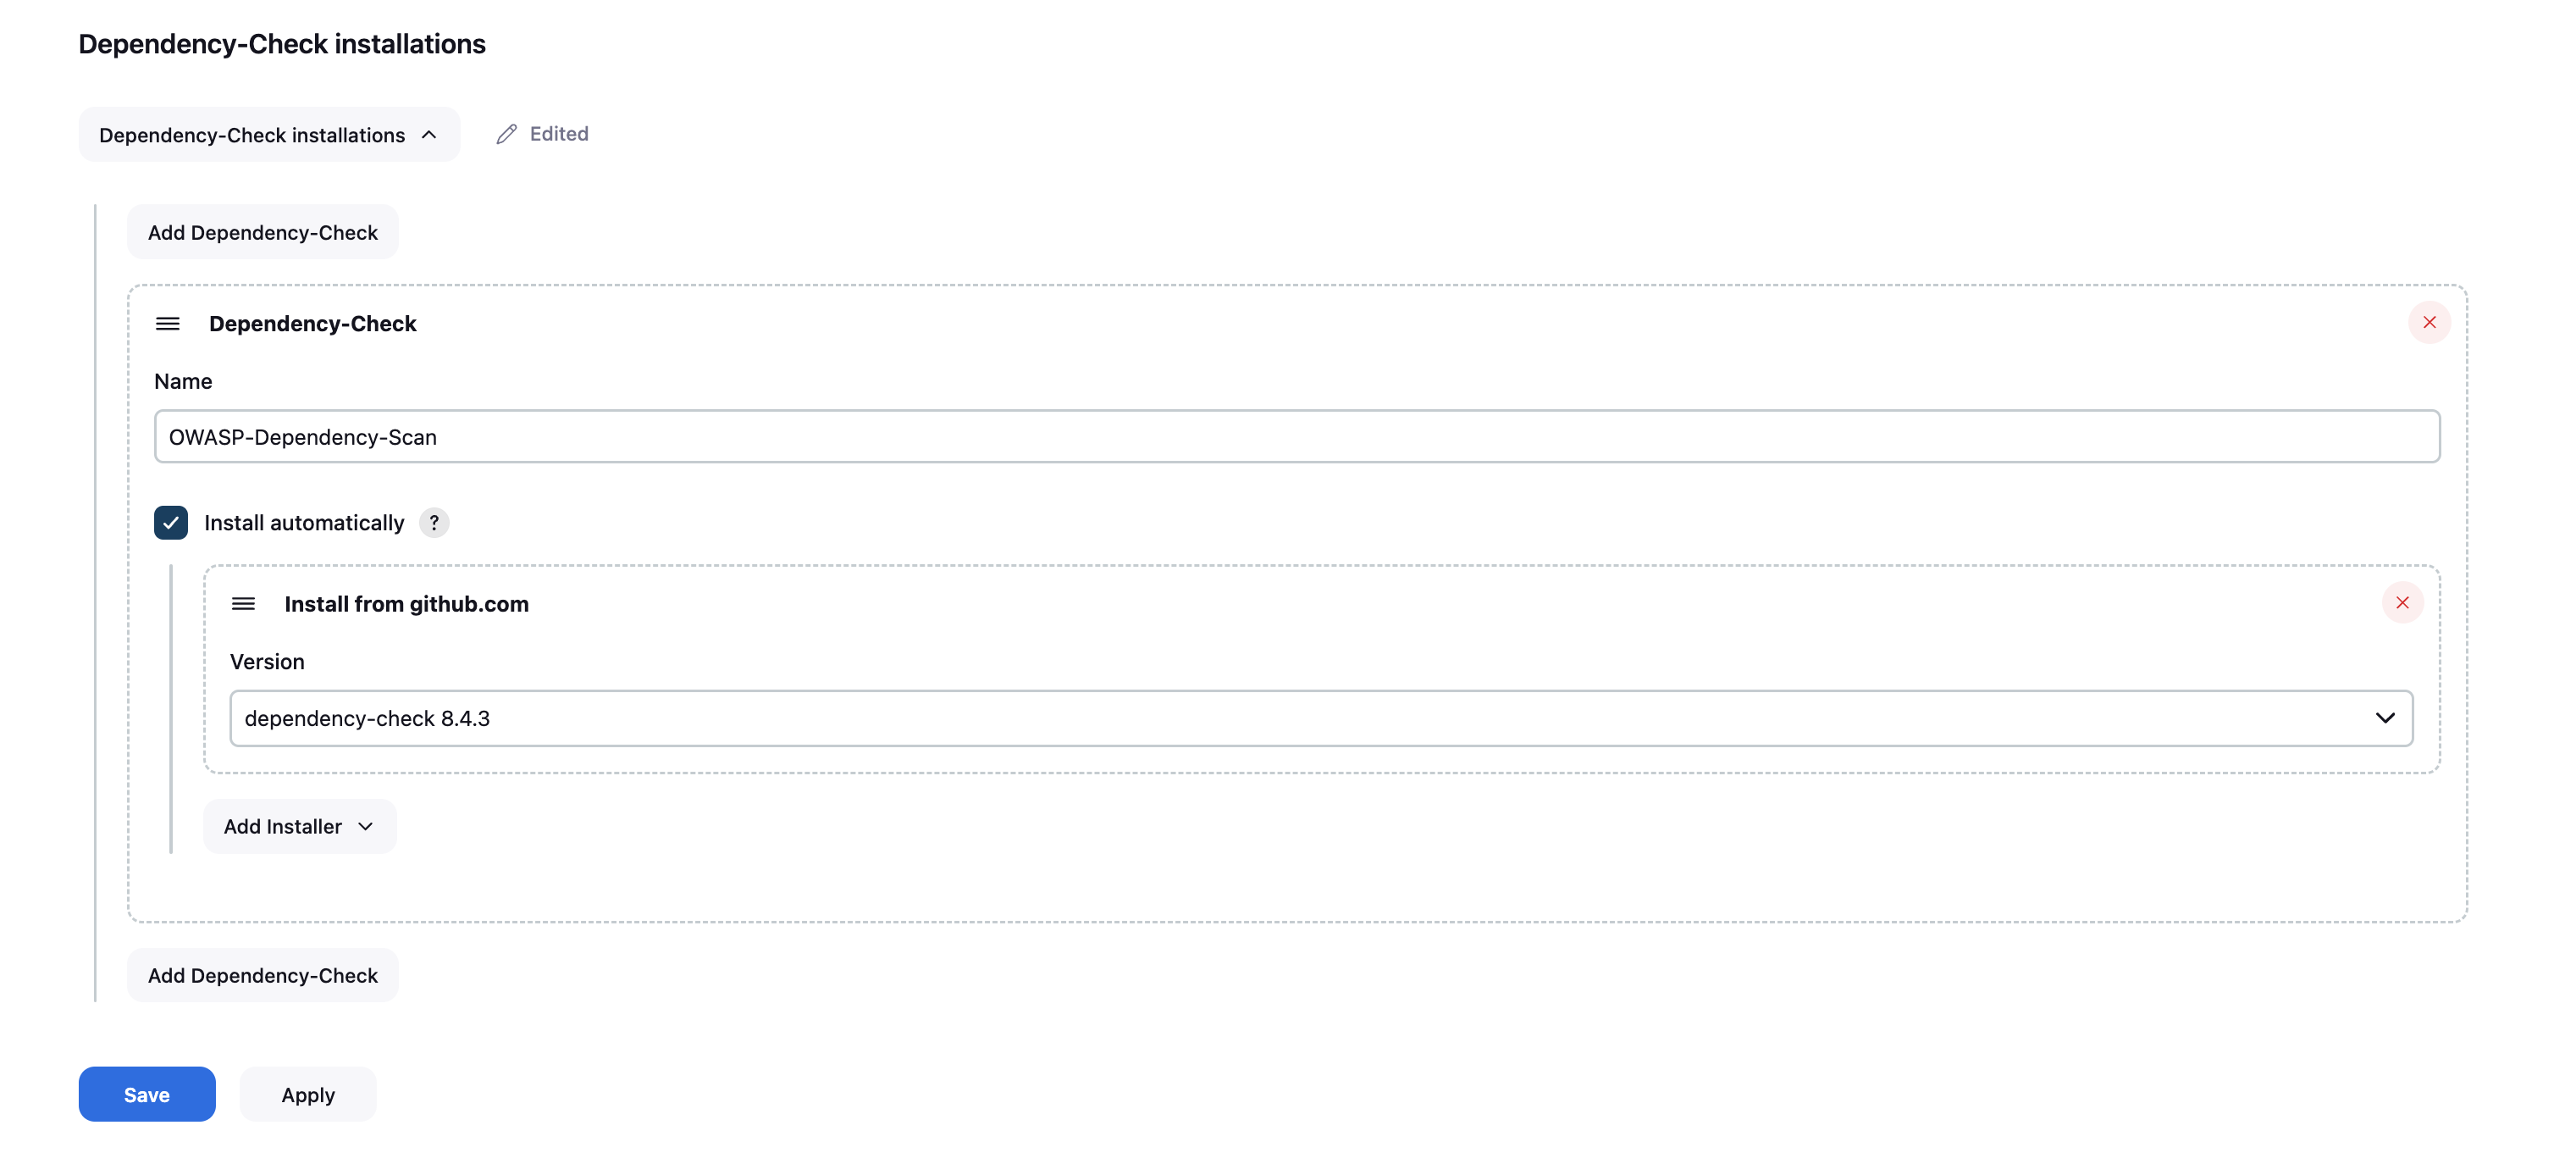
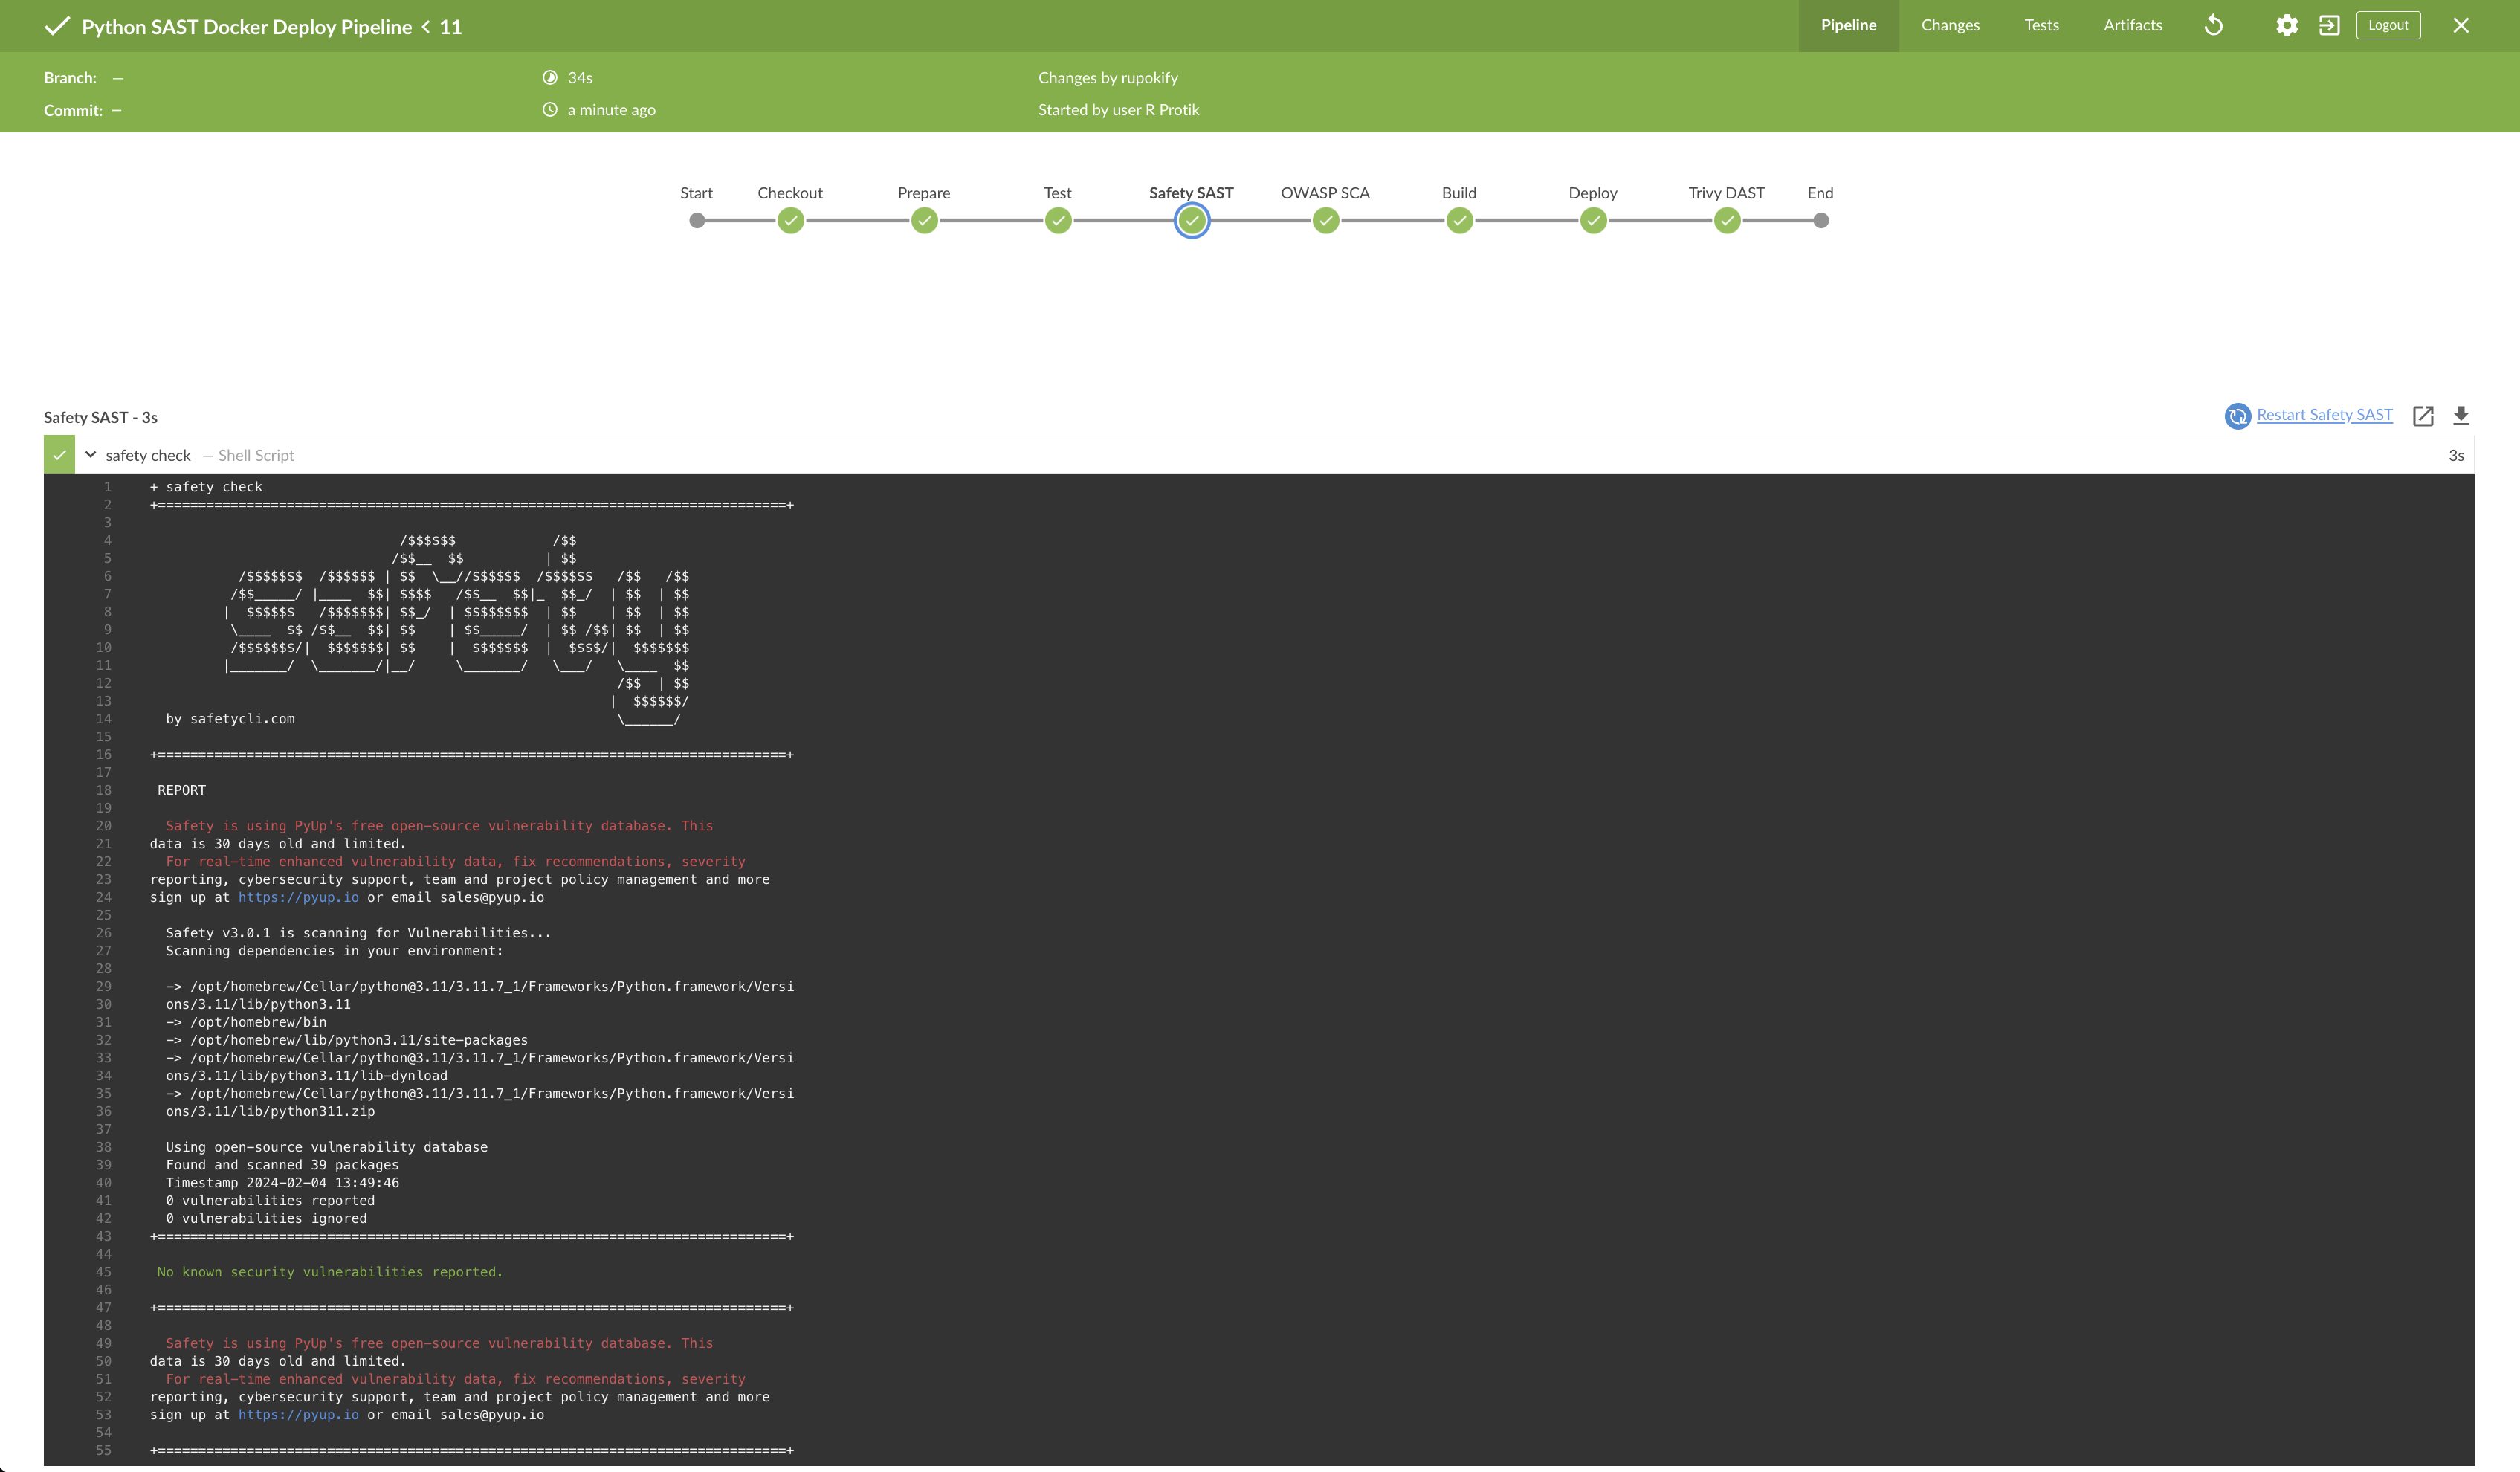
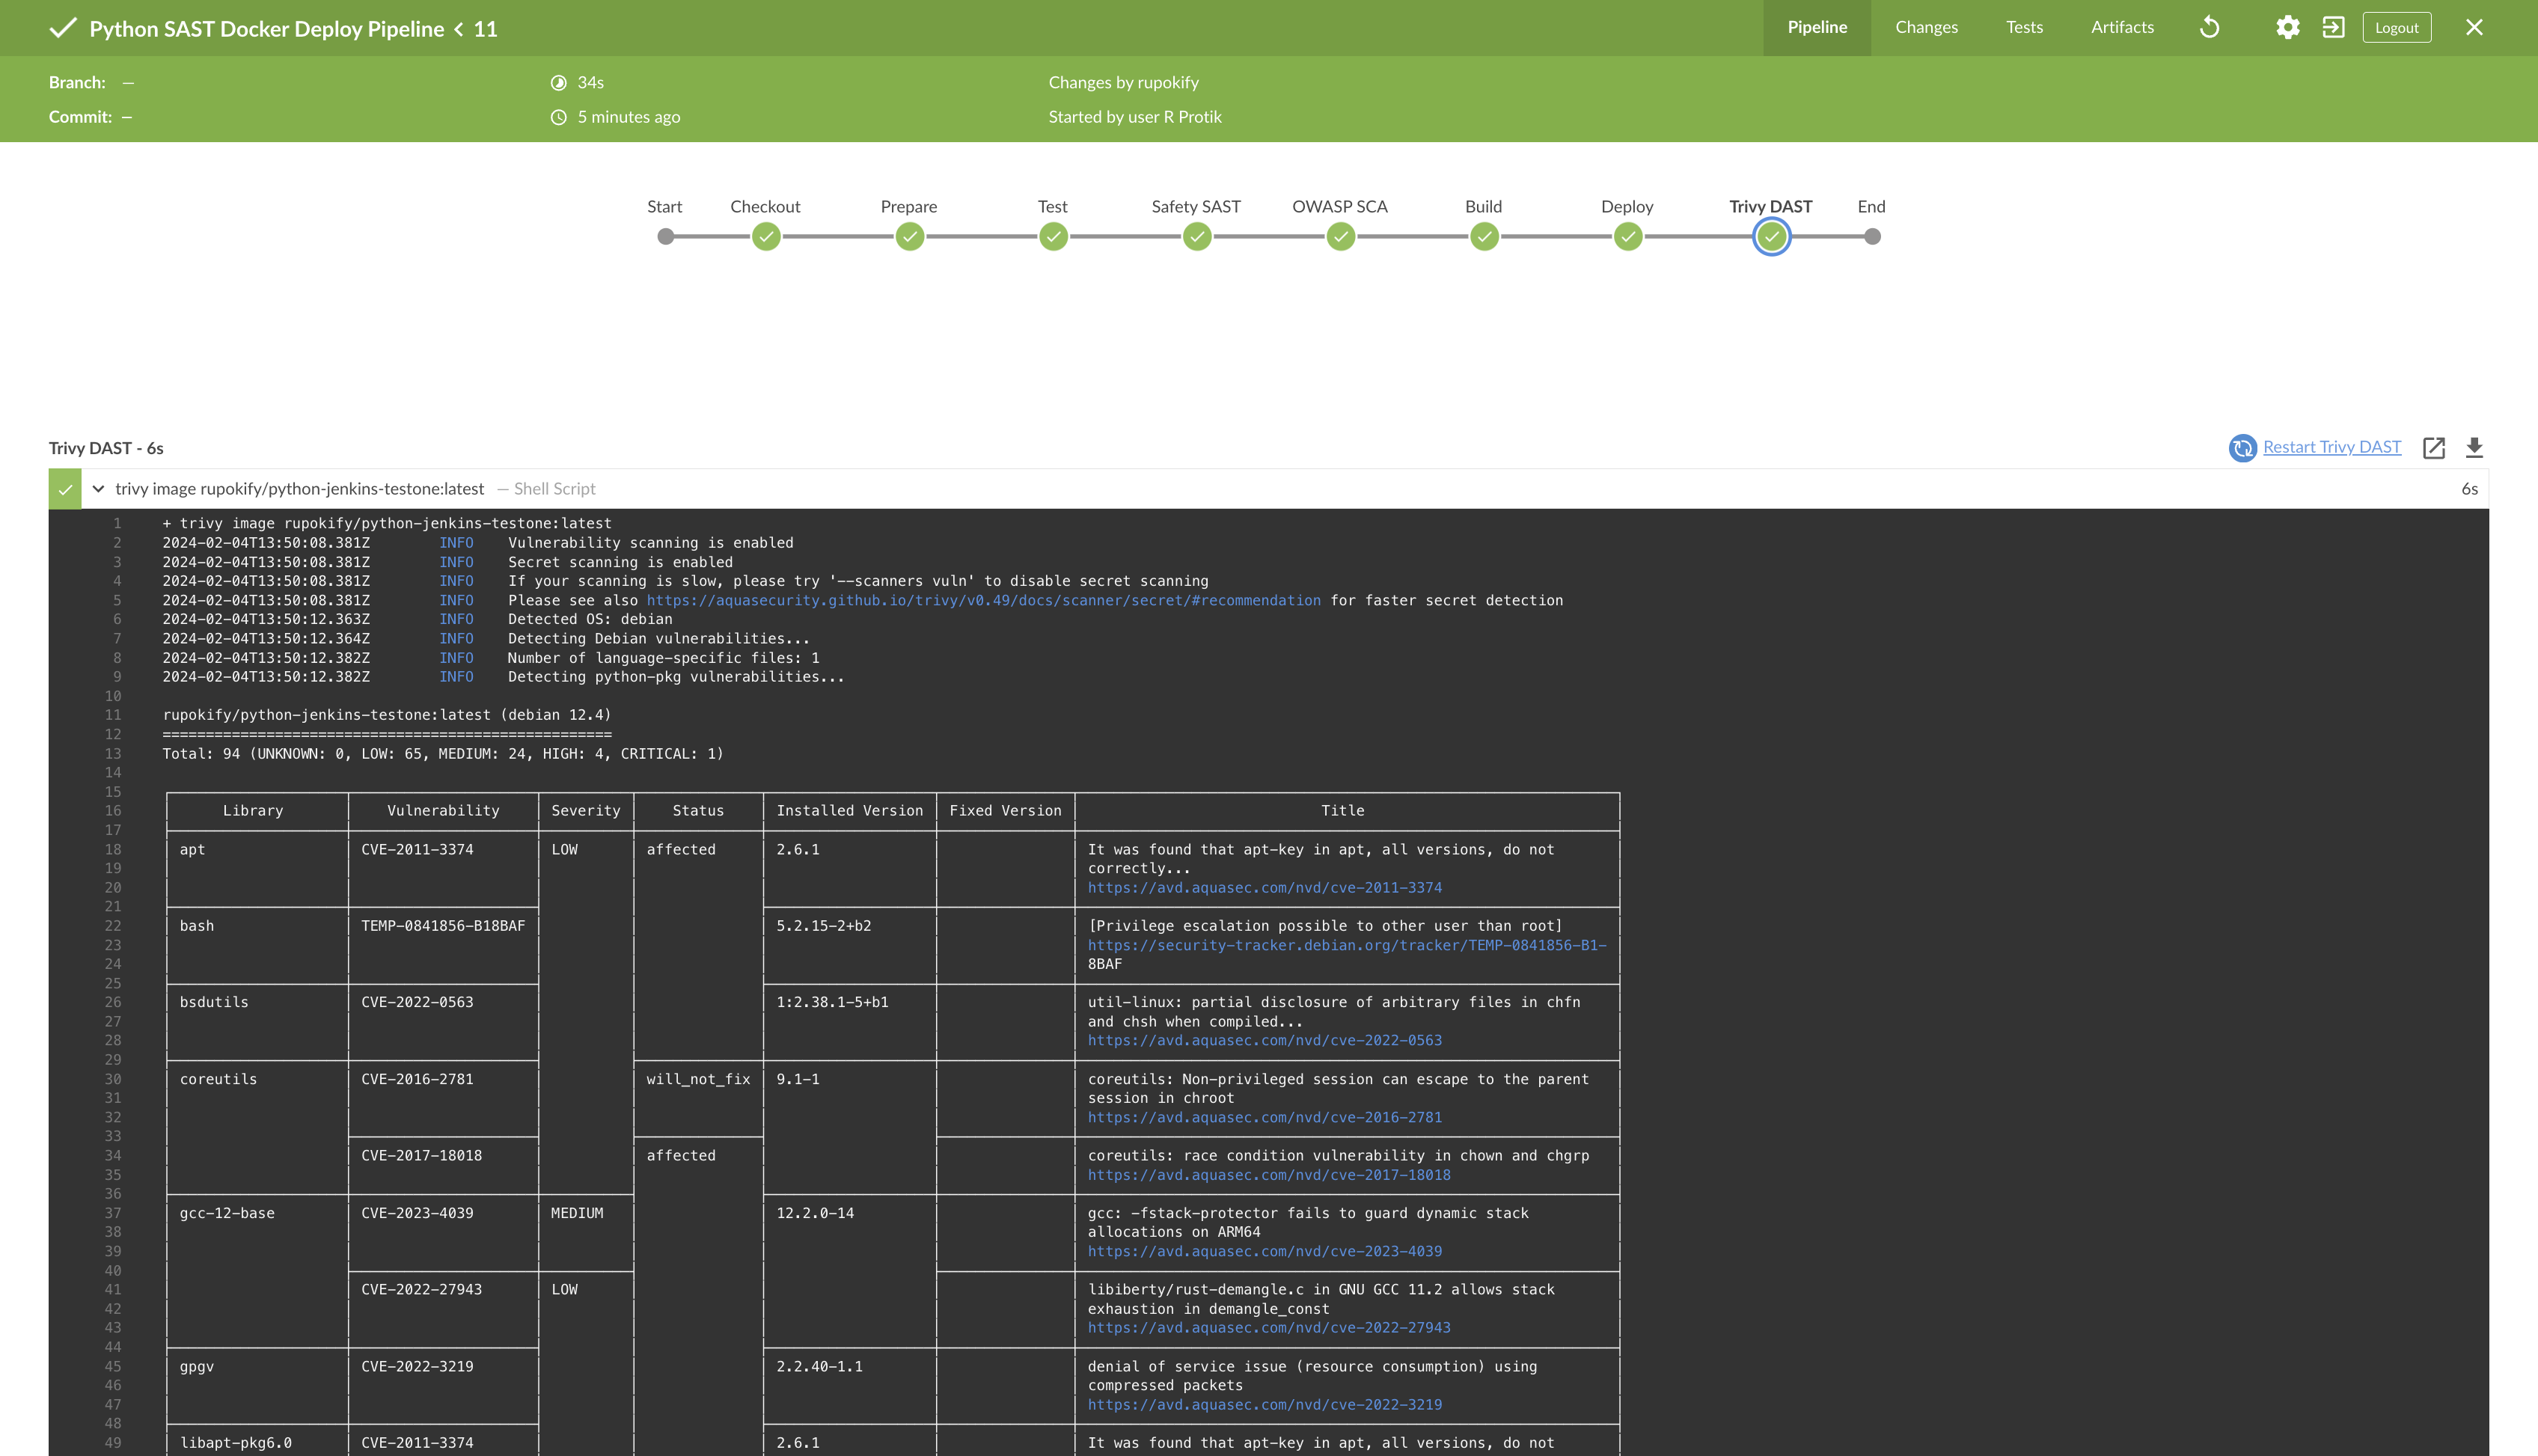
I created a couple of Pipeline stages here but the interesting ones are the SAST, SCA and DAST stages. You can use any SAST/DAST solution as per your need. To keep this simple, I’ve added the SafetyCLI solution here for SAST. For Software Comoposition Analysis (SCA), I have used the OWASP Vulnerability Checker. And for DAST, I have used Trivy. You need to install the “OWASP Dependency-Check Plugin” in Jenkins. Once installed, go to “Jenkins Dashboard > Manage Jenkins > Tools” section and scroll to the bottom. Under the “Dependency-Check installation” area, select “Install automatically”. Then “Install from GitHub.com” under the “Add Installer” option and then select the version from the dropdown and save.
SafetyCLI will automatically run SAST in our Python code during the CI/CD operation, OWASP Dependency-Checker will run the SCA and Trivy will run the DAST. This setup is probably the most basic DevSecOps operation but you get the idea.
That’s all the files we will need at this point. If you want to make it a little more fancy, you can install the “Blue Ocean” plugin in Jenkins.
Now create a GitHub repository and push the code there (again, not explaining that here!). Use this repository URL in the Jenkinsfile above.
It’s Showtime!
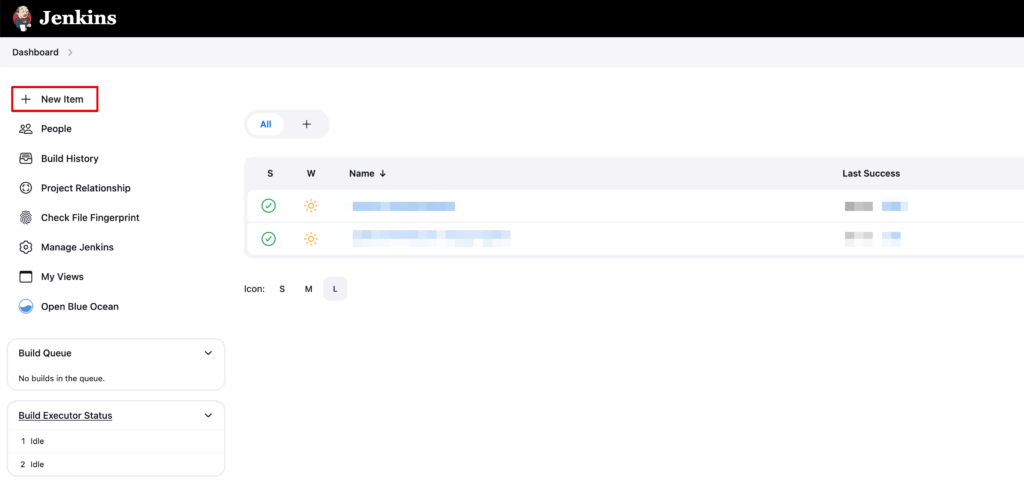
At first, create a “New Item” from the Jenkins Dashboard.
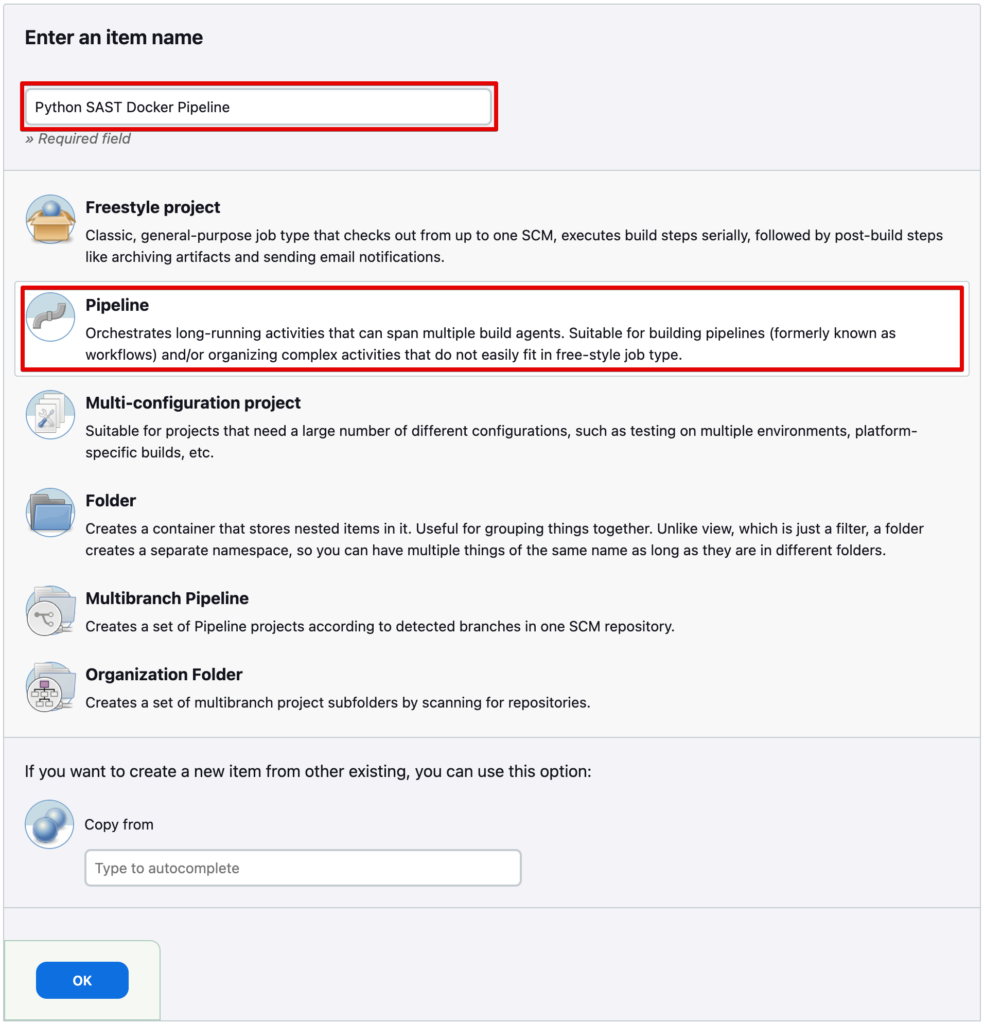
Select “Pipeline” and give it a name you want. Save it.
On the next screen, select “Github project” and enter your GitHub repository URL there and save.
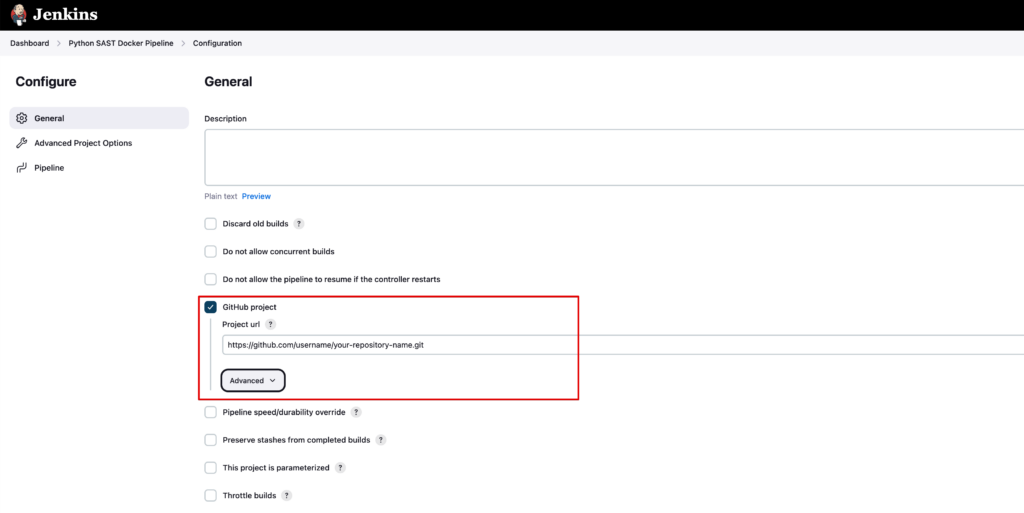
Also on the same screen, under the “Pipeline” section, select “Pipeline script from SCM”, select “Git” form the “SCM” option, add your GitHub repository link and select the GitHub credentials you created earlier in Jenkins configuration and set the proper GitHub branch name of your project. Save it.
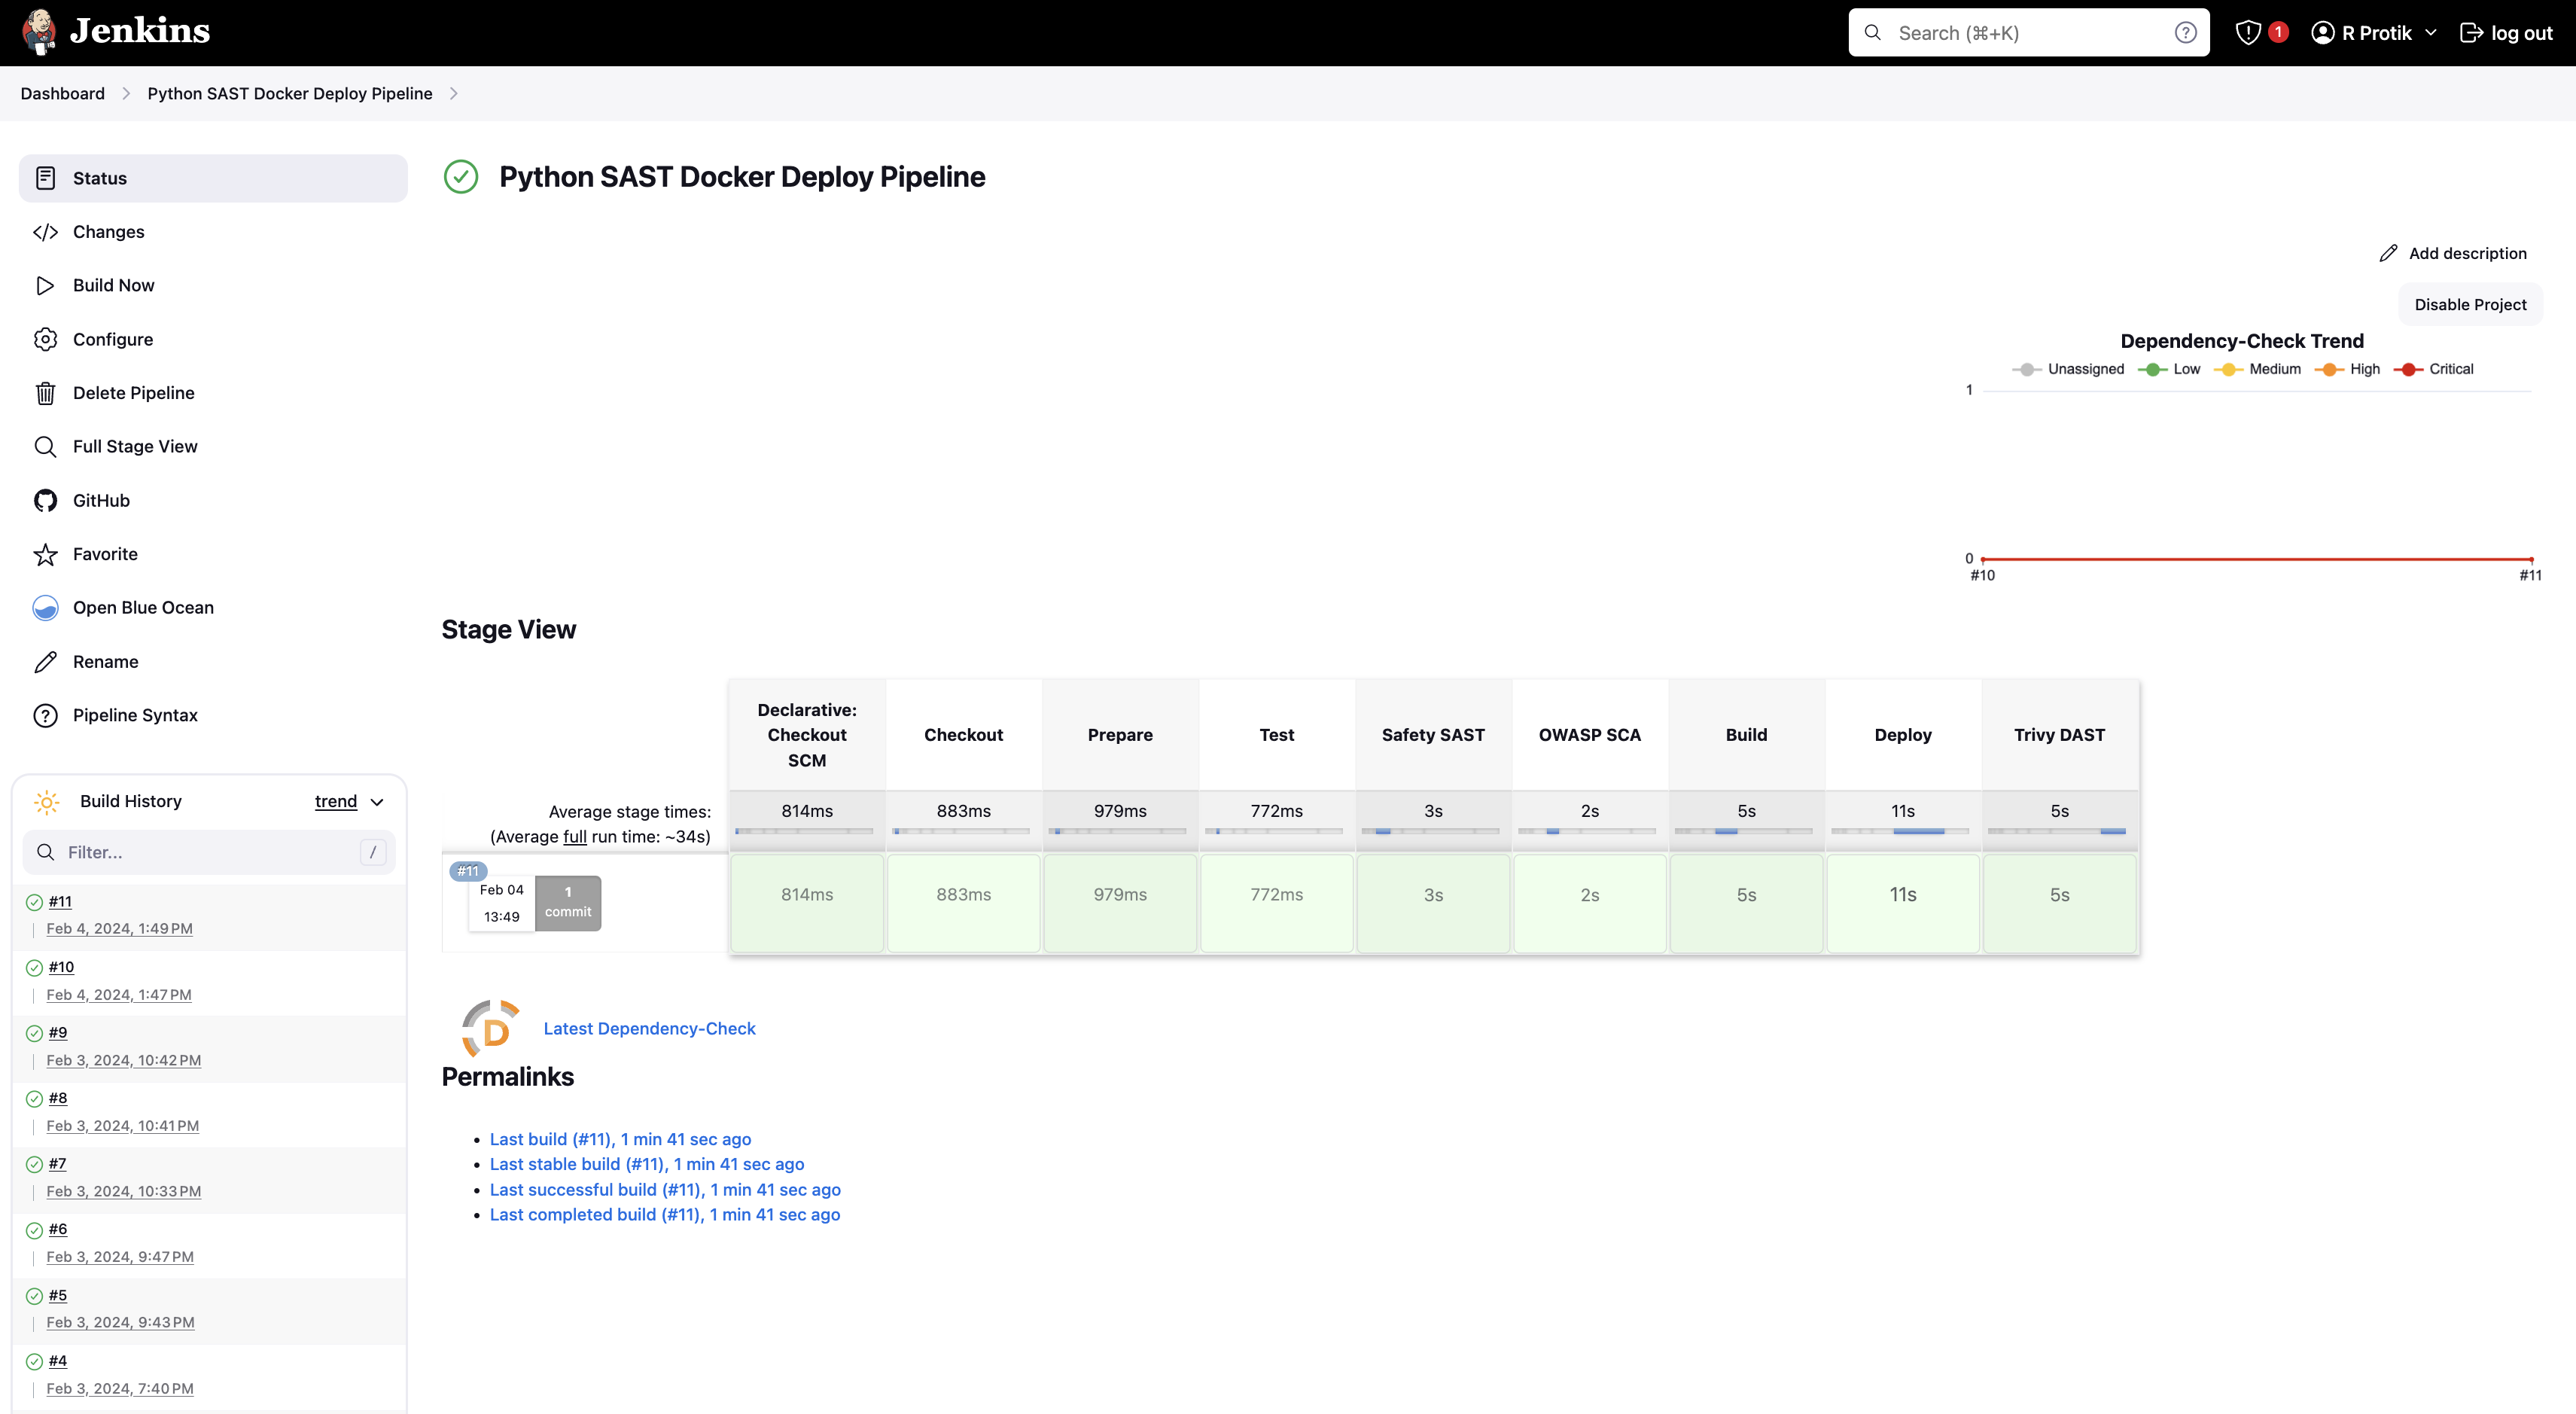
And we are ready. Go to Jenkins Dashboard (and to Blue Ocean if you want) and select the pipeline you just created. Click “Build Now” (or “Run” in Blue Ocean panel).
If things were done properly, your pipeline should run and finish smoothly.
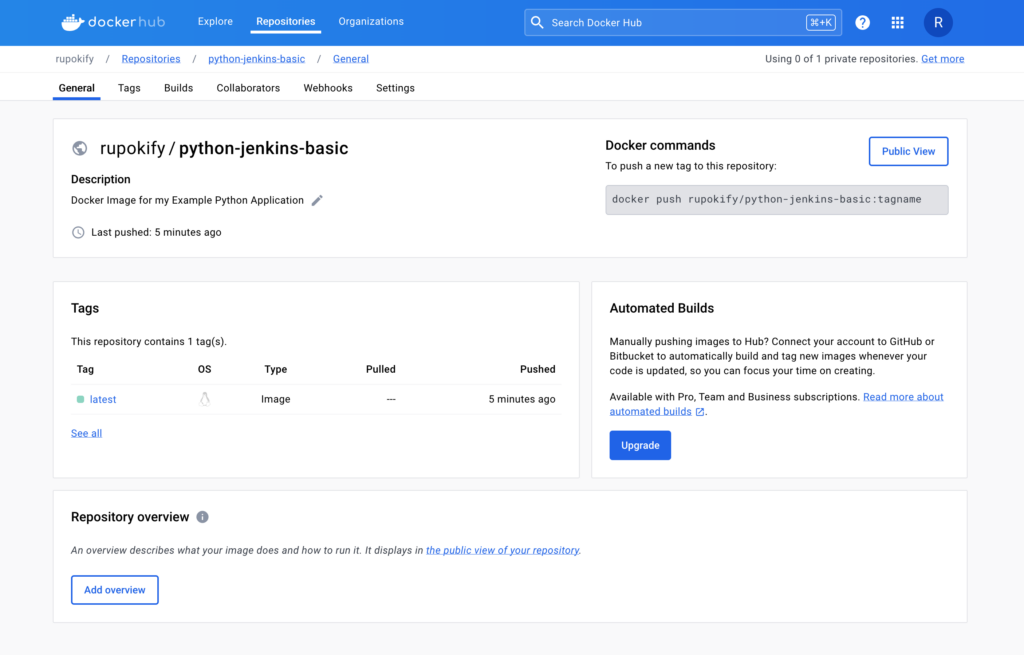
Also, if you go to your DockerHub account, you will see your new published Docker image there.
You can now run this published Docker image any way you want. If you use the Docker UI app, select the image and click the “Run” button and enter a custom container name if you want and set a Local Host port as you desire.
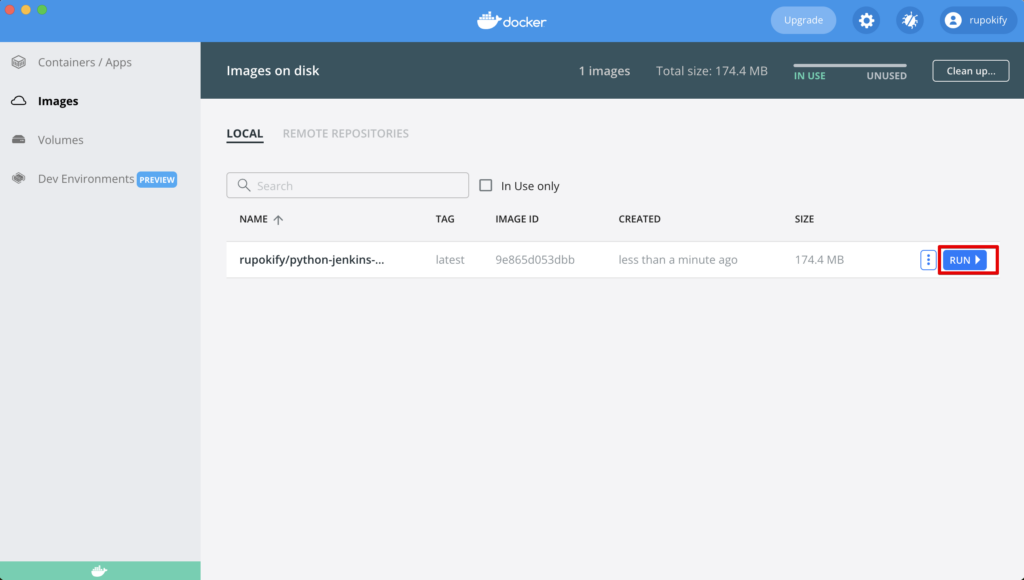

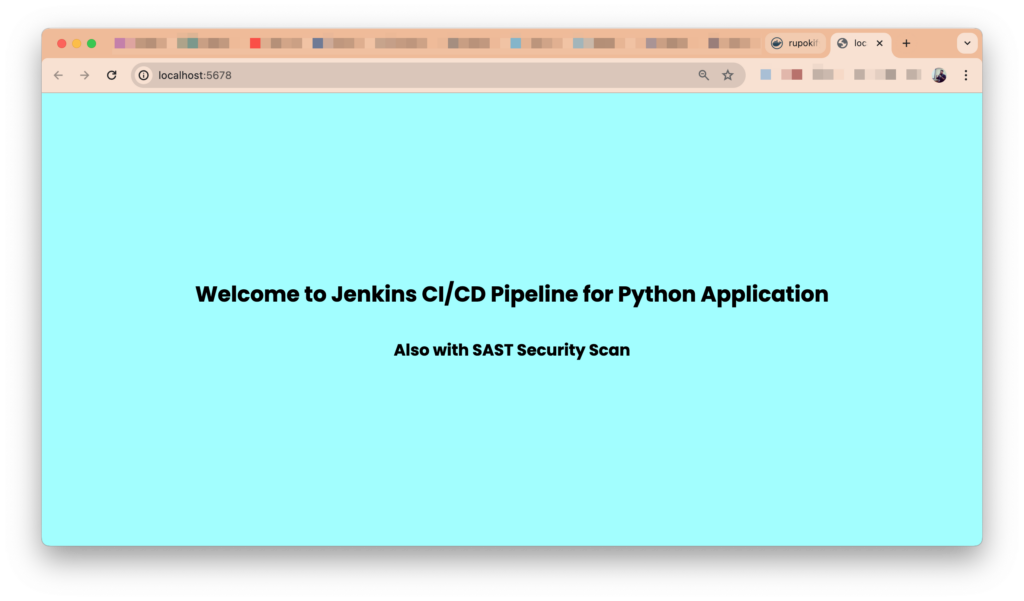
Now simply go to your localhost IP with the port and Ta-Da 🎉 The application will run and show the content in the browser!
That was easy, right? It’s absolutely normal if the build fails in any stage. All you need to do is look at the log and debug it because a successfull operation depends on a lot of things. But that’s the beauty of it. If you have any questions, feel free to ask in the comments.
Always remember, DevOps is not a destination, it’s a journey!!!