If you are reading this article with the word “Parallel Stages” in the title, I believe you already know what Jenkins is and what it does do. Still, if you want a quick refresher, you can have a look at one of my previous blog posts – Basic Jenkins CI/CD Pipeline for SAST/DAST/SCA Checked Dockerized Python App.
In this article, we will look at a little advanced way of developing a CI/CD pipeline in Jenkins. And of course, we are going to touch on the topic everyone is talking about now – Artificial Intelligence (AI). Fun fact – the featured image in this post is generated with DALL·E 3 AI.
Before going further, I think it will be nice to have a one-liner description of Jenkins.
Jenkins
Jenkins is an open source automation server which enables developers around the world to reliably build, test, and deploy their software.
Source: Jenkins Official Website

We are not going to dive deep into what is AI, what can AI do, etc. Rather, we will see how we can integrate AI-based SAST and SCA scans in our pipeline running in parallel with existing non-AI scans. The two important points here are – “parallel” and “ai based scans”.
Why Parallel Stages?
There are many use cases where parallel stages seem to be helpful. For example, if someone is building applications for multiple platforms (e.g. Android and iOS), it may seem more logical/appropriate to run both builds parallelly based on the requirements. And secondly, we will see how we can integrate AI-based SAST and SCA scans in our pipeline.
The use case we will take into consideration in this article is running AI-based scans in parallel with our existing scans. This will not only allow us to compare AI performance, output, and many other metrics with traditional scanning tools, but also will allow us to skip repeating non-AI stages. Moreover, because AI is still not highly mature in many scenarios, it may not be wise to fully rely on only AI-based scanning tools at this moment but it will be wise to prepare from now. On the contrary, AI-based tools may provide better results because AI is capable of taking broader context into consideration.
A nice way to observe the AI performance in this case is running more and more tests through newer and different code in a similar context. If we can run the AI scans in parallel with our existing tests, we won’t have to create a separate pipeline and can avoid redundancy.
In this article, we will see exactly how we can do that!
For AI-based SAST and SCA scan, we will use the free version of CodeThreat scanner. For Non-AI SAST and SCA scans, we will use OWASP Dependency-Check and SafetyCLI.
OWASP Dependency-Check
Dependency-Check is a Software Composition Analysis (SCA) tool that attempts to detect publicly disclosed vulnerabilities contained within a project’s dependencies.
Source: OWASP Dependency-Check Official Website

Safety CLI
Safety CLI 3 is a Python dependency vulnerability scanner that enables the secure use of Python packages, from development to deployment.
Source: SafetyCLI Official Website

CodeThreat
AI-Powered Code Analysis with less false positives. Integrate Code Analysis Swiftly into CI/CD.
Source: CodeThreat Official Website

Let’s talk business!
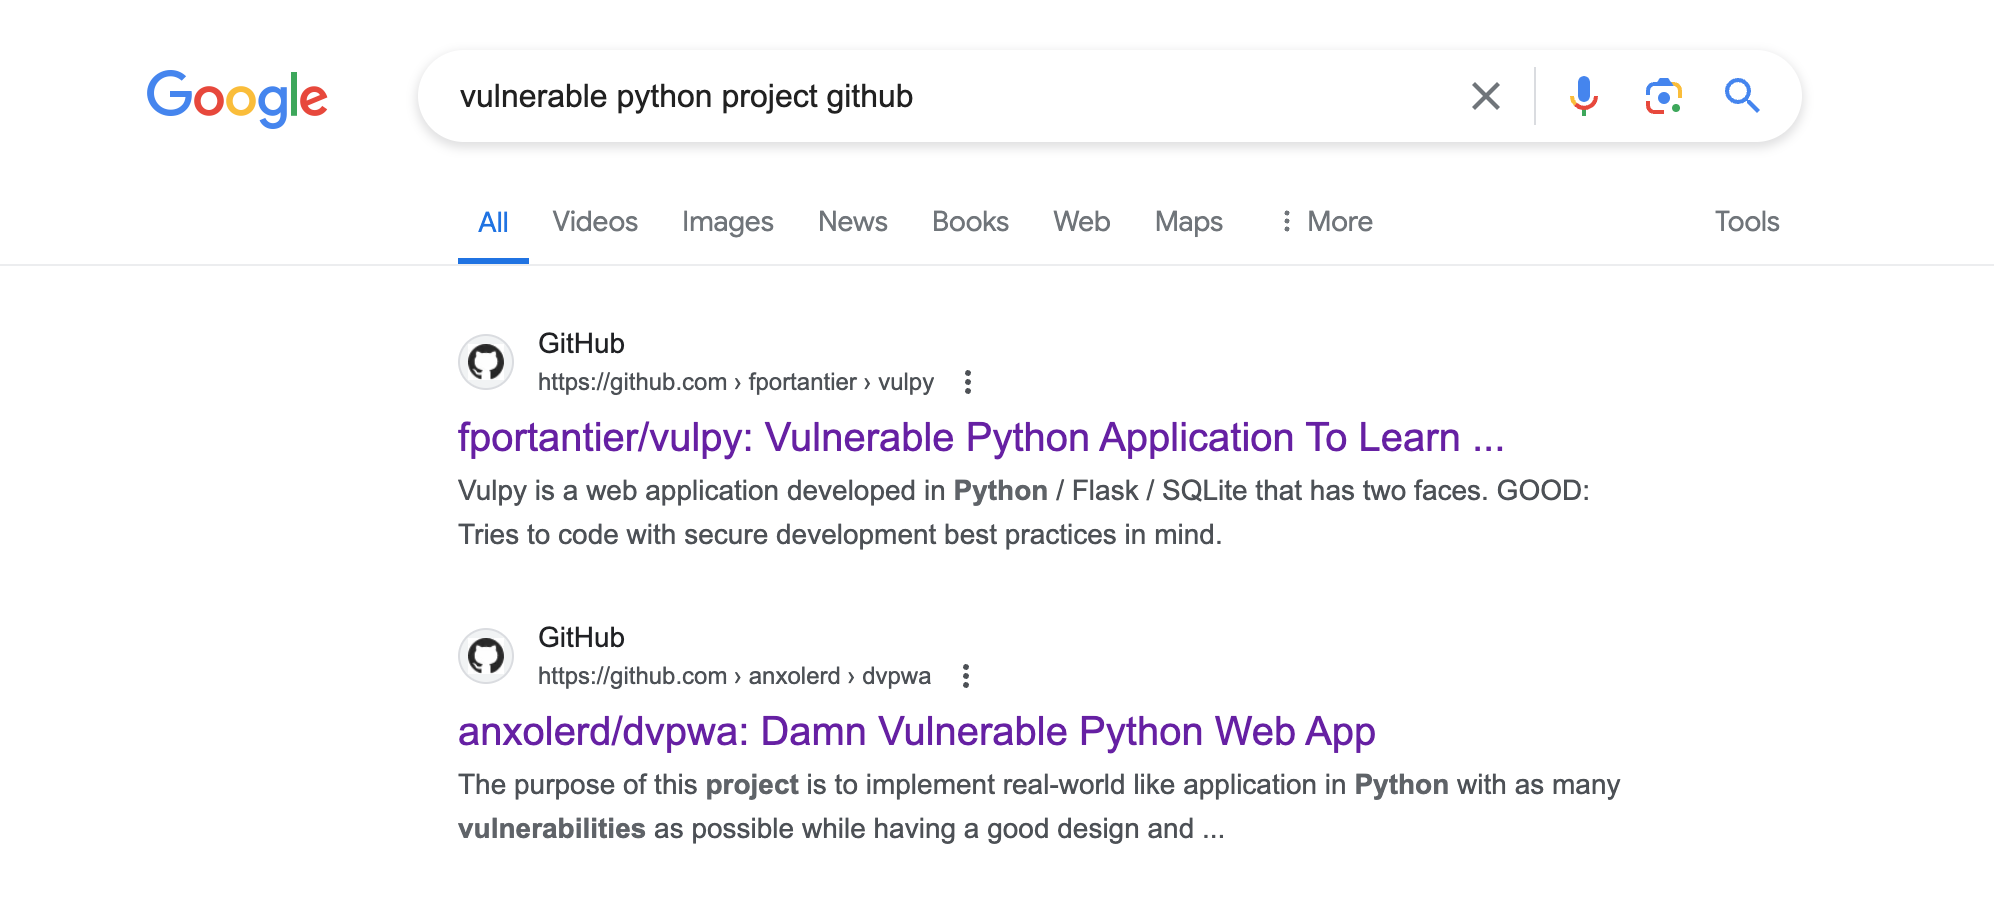
For demonstration purpose, we need a project with vulnerability and I prefer Python for its simplicity. I searched in Google with “vulnerable python project github” and the second result caught my attention. I’ll run the scans for that application. You can use any project you want.
Then we will need to sign up for a free CodeThreat account and create Access Token there. We will need both the CodeThreat Access Token and the Organization Name from the CodeThreat portal.
Now we can proceed to create a new pipeline in Jenkins. We will configure the pipeline with pipeline script just to keep it simple. In the script textarea, paste the following script:
pipeline {
    agent any
    stages {
        stage('Checkout') {
            steps {
                git branch: 'master', credentialsId: 'XXXX-XXXX-XXXXXX', url: 'https://github.com/anxolerd/dvpwa.git'
                sh 'zip -r parallelx.zip .'
            }
        }
        stage('Parallel SAST SCA') {
            parallel {
                stage('Not-AI') {
                    stages {
                        stage('OWASP SCA') {
                            steps {
                                dependencyCheck additionalArguments: '', odcInstallation: 'OWASP-Dependency-Scan'
                                dependencyCheckPublisher pattern: '**/dependency-check-report.xml'
                            }
                        }
                        stage('Safety SAST') {
                            steps {
                                sh 'safety check'
                            }
                        }
                    }
                }
                stage('With AI') {
                    stages {
                        stage('CodeThreat AI SAST SCA'){
                            steps {
                                withCredentials([string(credentialsId: 'jenkins_credentials_id', variable: 'codethreat_access_token_name')]) {
                                    CodeThreatScan(
                                        ctServer: "https://cloud.codethreat.com",
                                        fileName:"parallelx.zip",
                                        maxNumberOfHigh: 23,
                                        maxNumberOfCritical: 23,
                                        weaknessIs: ".*injection,buffer.over.read,mass.assigment",
                                        condition: "OR",
                                        project_name: "PROJECT-NAME",
                                        credentialsId: "jenkins_credentials_id",
                                        organization_name: "your_organization_name"
                                    )
                                }
                            }
                        }
                    }
                }
            }
        }
    }
}
You will need to add the credentials in your Jenkins environment (again, to keep it simple, I’m not describing how to add credentials in Jenkins). Once the credentials are in place, please replace the GitHub credentialsID and CodeThreat credentialsID with your own. Also, replace “codethreat_access_token_name” and “your_organization_name” with your own CodeThreat details. You can also tweak the parameters in the steps as per your need.
Once completed, we can save the pipeline script and finally run the build. For better visibility, I used the “Jenkins Blue Ocean” plugin.
If everything is configured properly, you will see that now the scans are running in parallel.
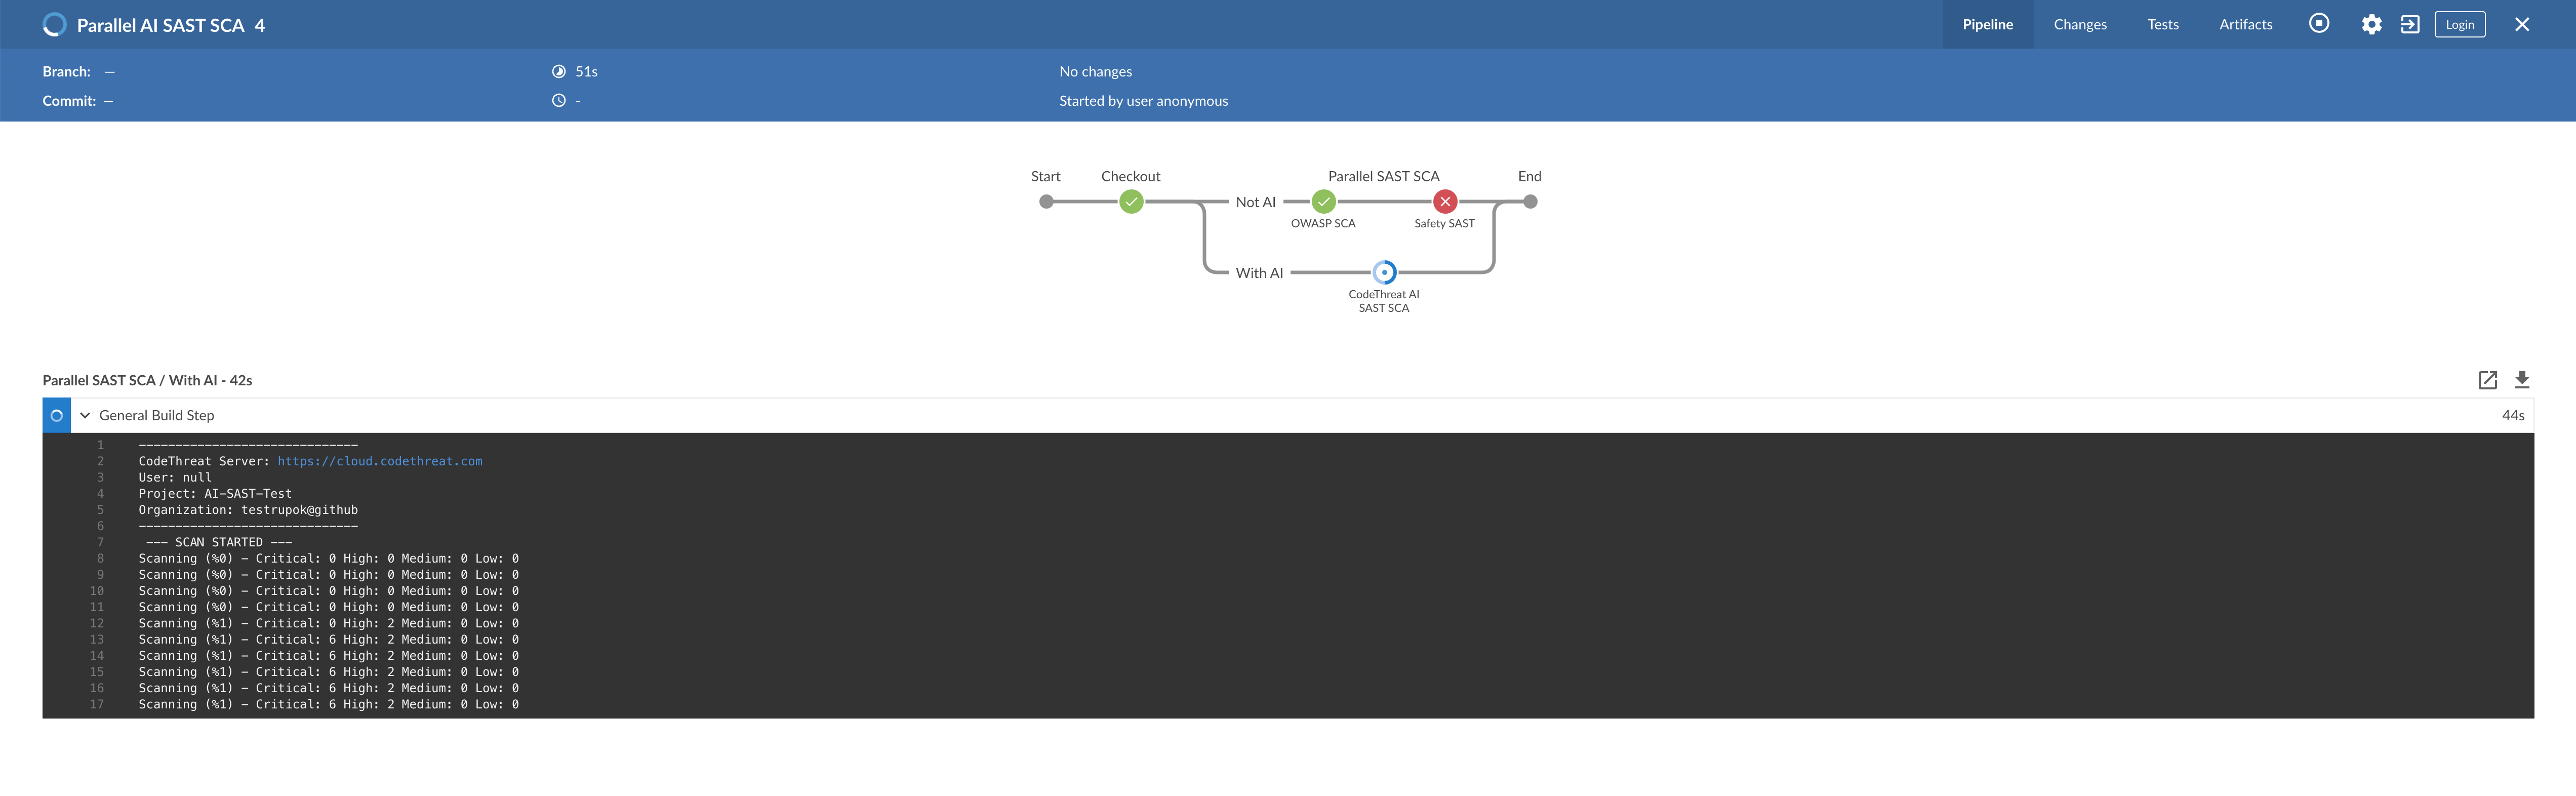
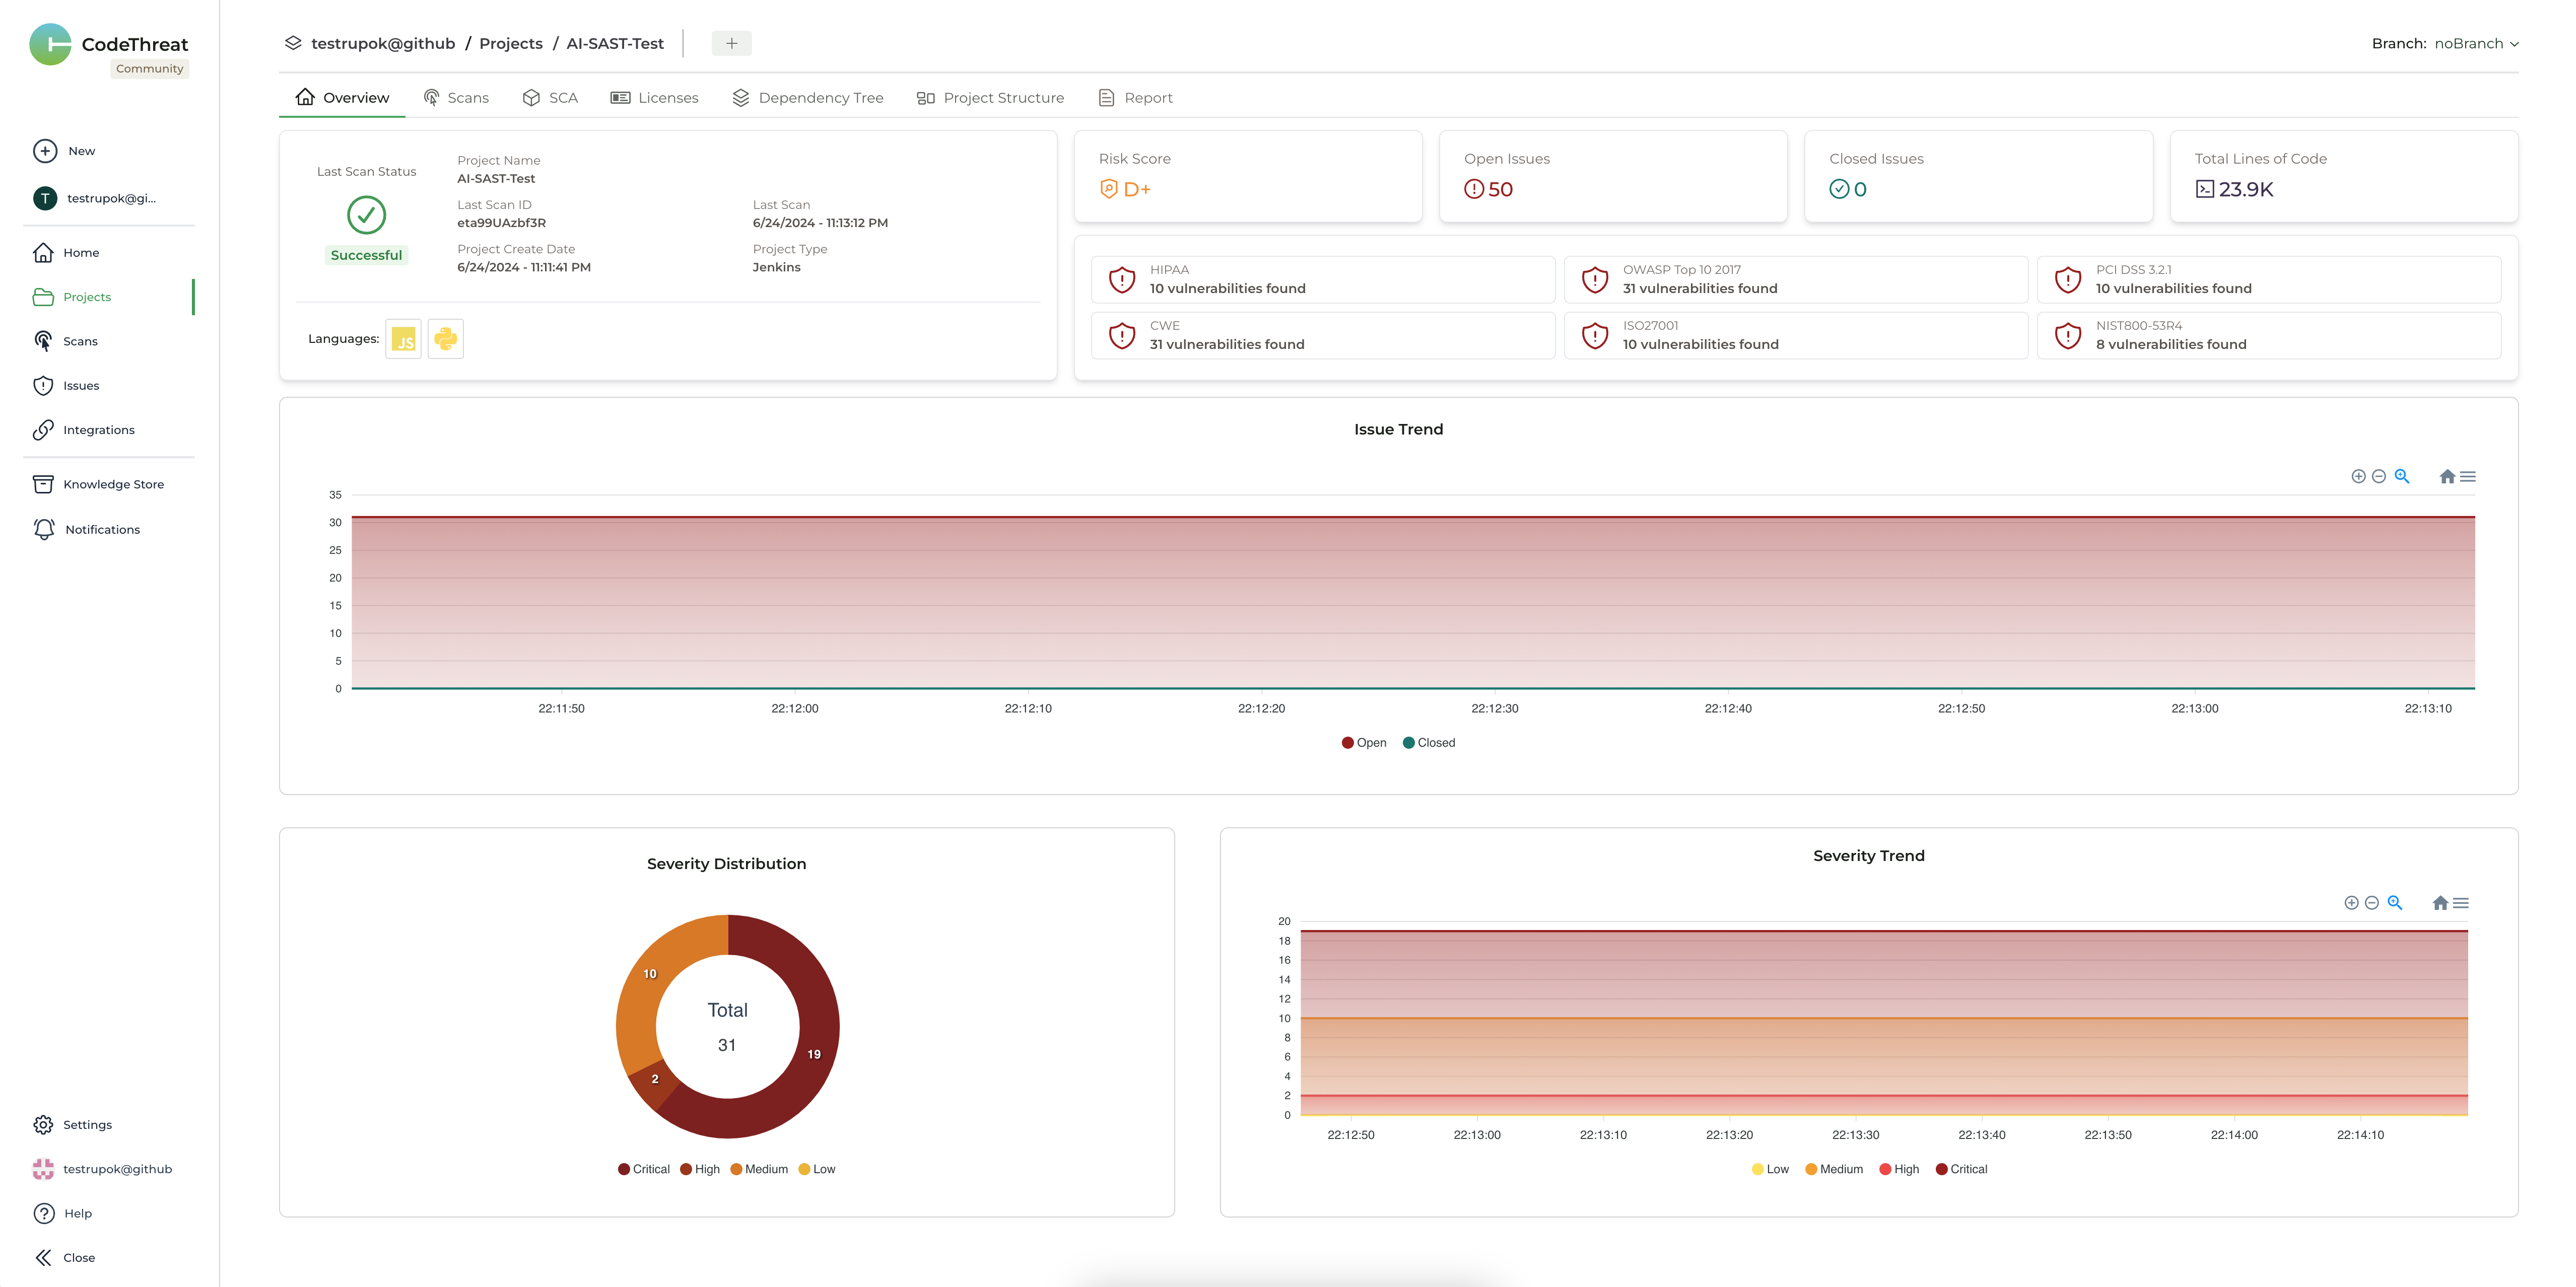
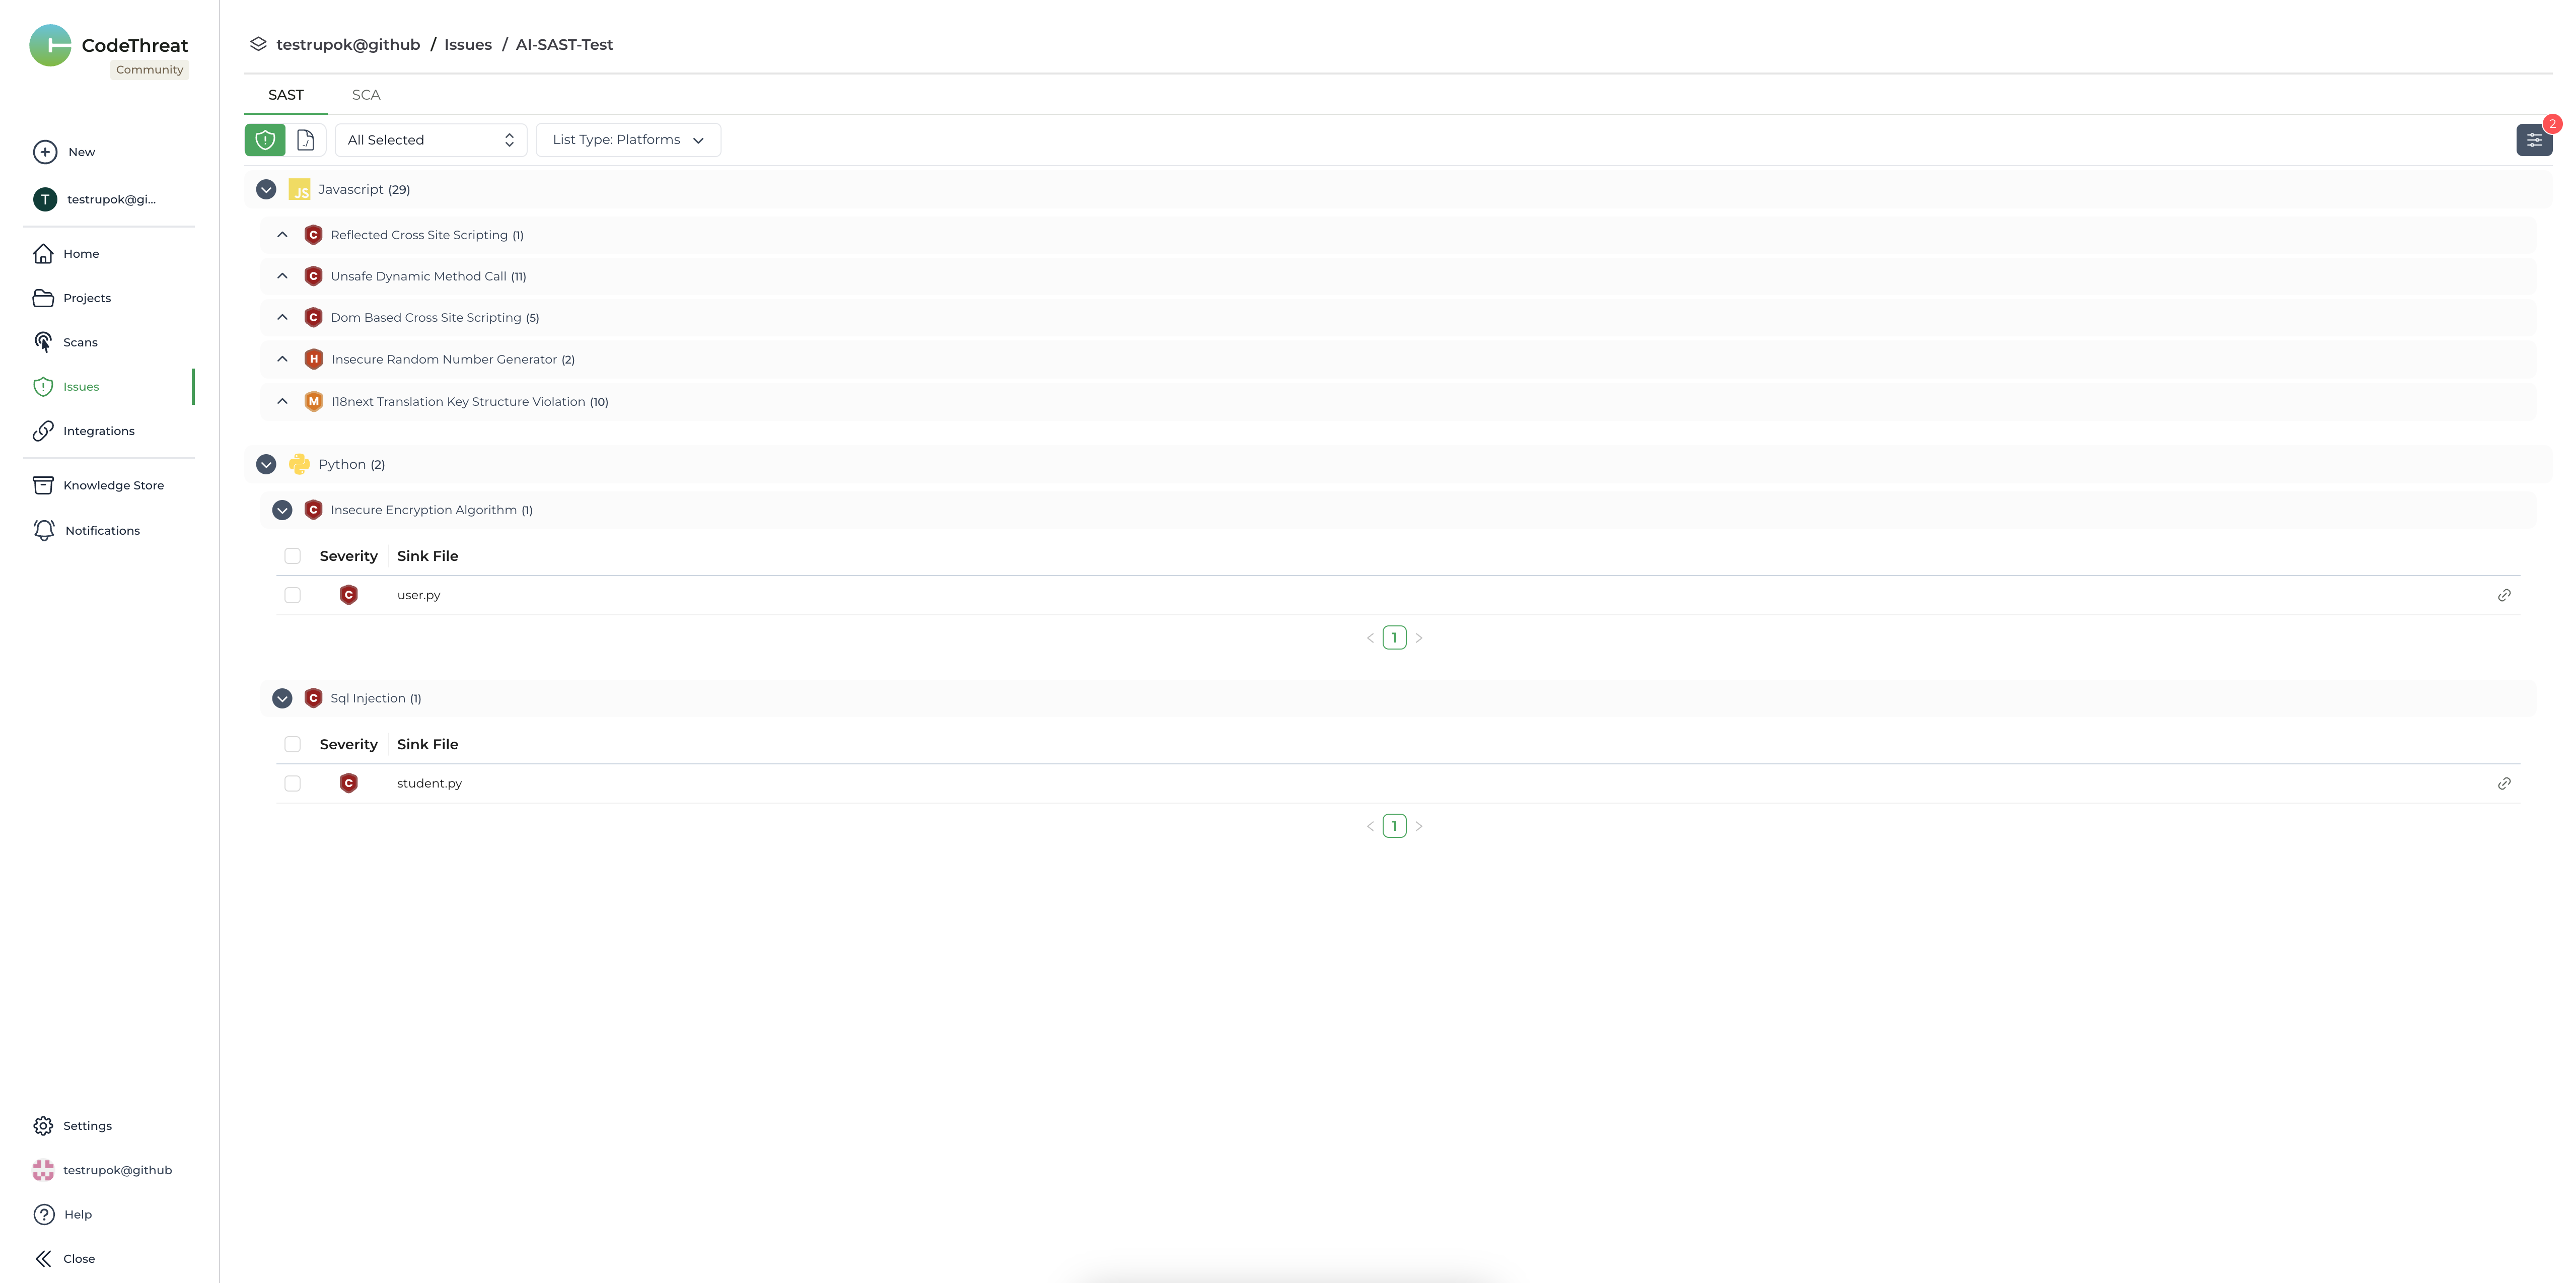
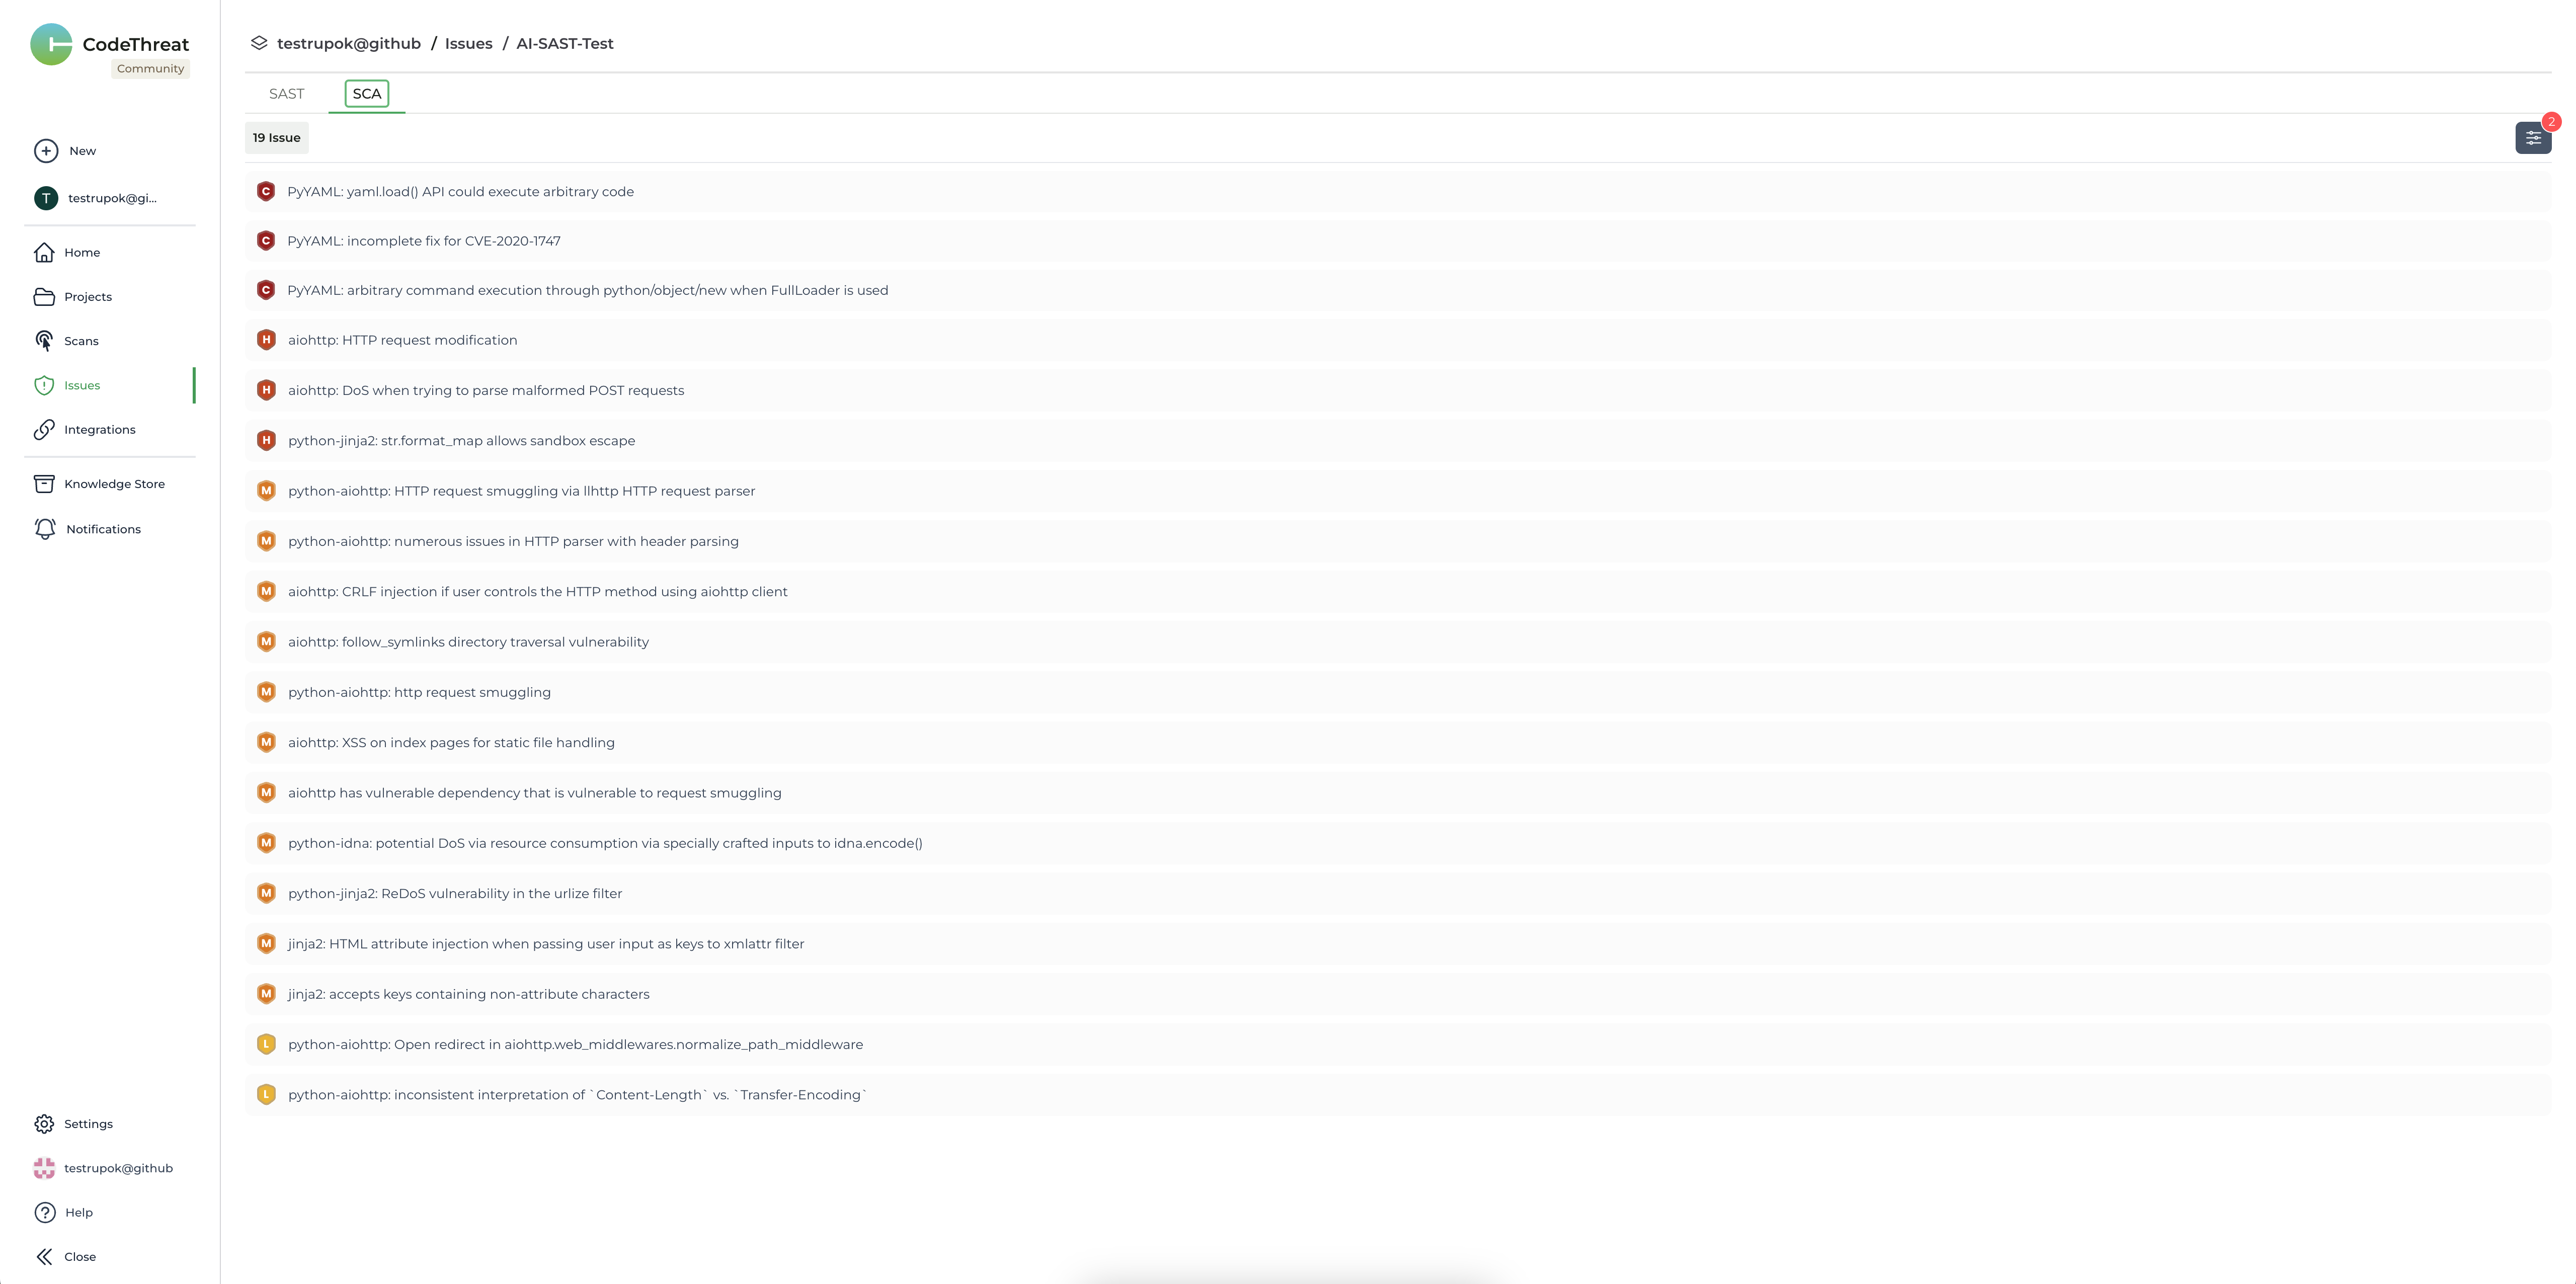
Now we can see the scan report right on the screen. Moreover, we can also see the AI-based SAST and SCA scan results on the CodeThreat website and compare them with the results of our existing tools.
And that’s it 🎉
We have seen how easily we can create paralles stages in declarative pipeline in Jenkins. It’s a bit advanced, but not necessarily more complicated. The stages are the same, but we have designed the pipeline in such a way that specific stages run in parallel.
I hope this will help. Please feel free to share your suggestions and feedback in the comments section below. If you have any questions, I’ll be happy to answer. May your DevSecOps journey be enjoyable 🖖